Easy Homemade Bread Recipe – Delicious & Simple
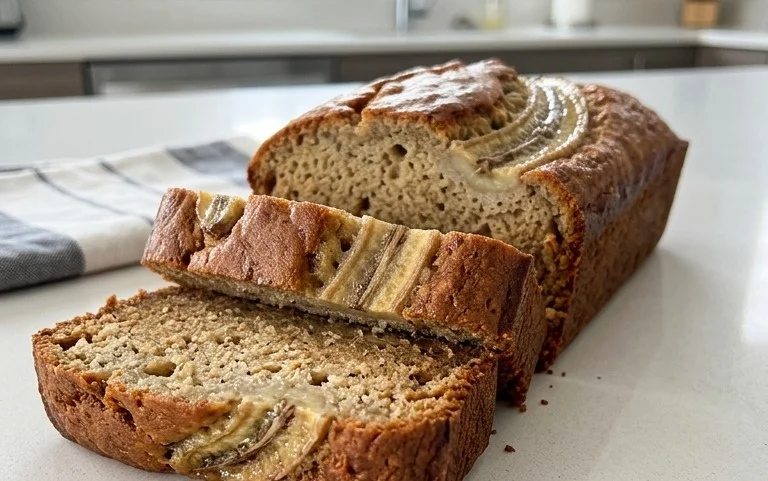
Homemade bread is more than just a recipe; it’s an experience. There’s a primal satisfaction that washes over you as you knead dough, a sense of accomplishment that culminates in the aroma of freshly baked loaves filling your kitchen. Why do we love it so much? It’s the taste, of course – that inimitable combination of a crisp crust yielding to a soft, airy interior. But it’s also the ritual, the mindful creation of something fundamental and nourishing with your own two hands. This isn’t just about sustenance; it’s about connecting with tradition, about bringin extractg a touch of warmth and comfort into our lives that store-bought simply can’t replicate. The unique magic of homemade bread lies in its simplicity and its profound impact on our senses. Today, we’re going to embark on that wonderful journey together, and you’ll discover just how rewarding making your own homemade bread can be.
Homemade Bread
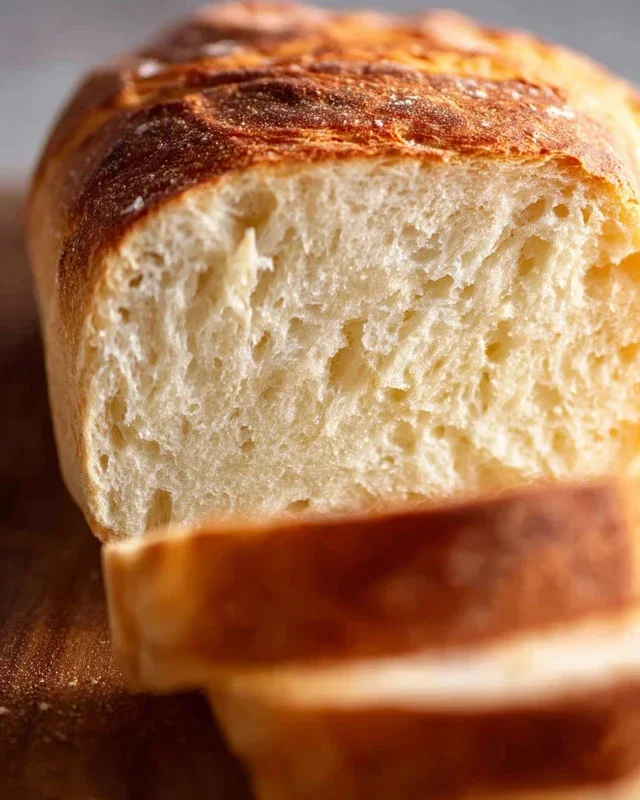
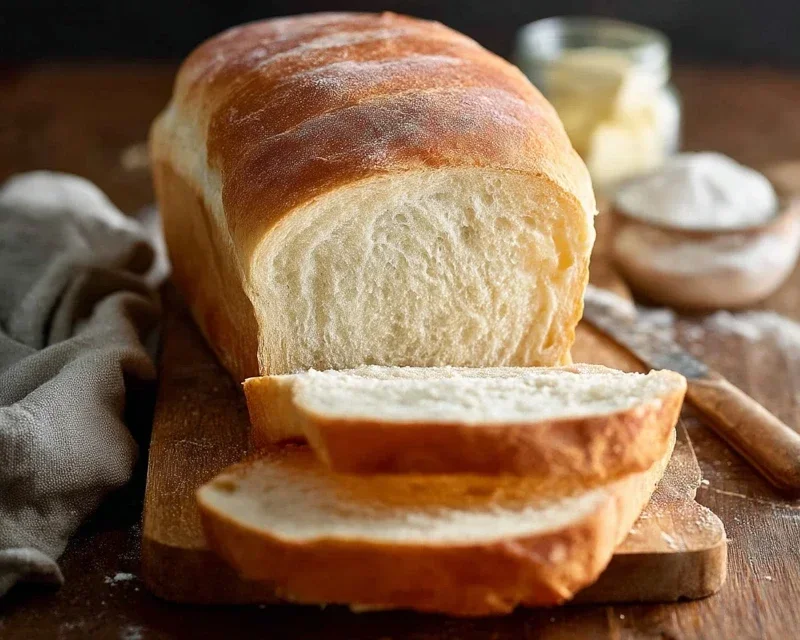
There’s a special kind of magic that happens when you pull a loaf of freshly baked bread from your own oven. The aroma alone is enough to fill your home with warmth and comfort, and the taste… well, there’s nothing quite like it. Forget those store-bought loaves that often fall flat in texture and flavor. Making your own bread is surprisingly accessible, and the satisfaction you’ll get from this simple recipe is immense. It’s a process that connects you to something primal and satisfying, turning humble ingredients into a delicious masterpiece. This recipe is designed to be forgiving, perfect for begin extractners, yet rewarding enough for seasoned bakers. We’ll walk through each step, ensuring you achieve that perfect crust and fluffy interior every time.
Ingredients:
Getting Started: Activating the Yeast
The first crucial step in any bread-making journey is ensuring your yeast is alive and ready to work its magic. In a large mixing bowl, combine the 2 cups of warm water. The temperature is key here; too hot and you’ll kill the yeast, too cool and it won’t activate properly. Aim for that sweet spot between 105 and 115 degrees Fahrenheit. If you don’t have a thermometer, you can test it by feeling it on your wrist – it should feel comfortably warm, like a baby’s bathwater. Sprinkle the 1 tablespoon of active dry yeast over the warm water. Now, add your sweetener – either the 1/4 cup of honey or sugar. Honey will lend a slightly richer, more complex flavor and a lovely golden hue to your finished loaf, while sugar will create a classic, slightly sweeter bread. Let this mixture sit undisturbed for about 5 to 10 minutes. You’ll know the yeast is active when it becomes foamy and bubbly on the surface, almost like a little science experiment happening right in your bowl. If you don’t see this foamy activity, your yeast might be old, and you should start over with fresh yeast.
Building the Dough
Once your yeast is happily frothing, it’s time to introduce the other components. Add the 2 teaspoons of salt to the yeast mixture. Salt is essential not just for flavor, but also for controlling the yeast’s activity and strengthening the gluten structure of the dough. Next, pour in the 2 tablespoons of oil. Oil contributes to a softer crum extractb and helps to keep the bread moist. Now, it’s time to start adding the flour. Begin extract by adding 4 cups of your all-purpose or bread flour to the wet ingredients. Bread flour generally contains more protein, which develops more gluten and results in a chewier, more structured loaf, but all-purpose flour works wonderfully too for a softer bread.
Using a sturdy spoon or a dough whisk, start mixing the ingredients together. The mixture will become quite shaggy and difficult to stir. This is where things start to get hands-on!
Kneading the Dough: Developing the Gluten
This is perhaps the most satisfying part of the process. Once the dough has come together as a rough mass, turn it out onto a lightly floured surface. It will likely be sticky at this stage. Begin extract to knead the dough. If it’s excessively sticky, add a little more flour, a tablespoon at a time, until it’s manageable but still slightly tacky to the touch. To knead, push the dough away from you with the heels of your hands, then fold it back over on itself. Rotate the dough a quarter turn and repeat. Continue this process for about 8 to 10 minutes. You’re looking for the dough to become smooth, elastic, and to spring back slowly when gently poked. This kneading process develops the gluten, which gives the bread its structure and chew. It’s a great workout for your arms, and the transformation of the dough from sticky mess to smooth ball is incredibly rewarding. Don’t be afraid to get your hands dirty; it’s all part of the fun!
First Rise: Letting the Dough Prove
After kneading, shape the dough into a smooth ball. Lightly oil a clean bowl (you can even use the same one you used for mixing if you give it a quick rinse). Place the dough in the oiled bowl and turn it to coat all sides with a thin layer of oil. This prevents a dry crust from forming. Cover the bowl tightly with plastic wrap or a clean kitchen towel. Find a warm, draft-free spot for the dough to rise. This could be in a slightly warm oven (turned off, of course), or just on your countertop in a warm room. Let the dough rise for about 1 to 1.5 hours, or until it has doubled in size. This is called the first rise, or proofing, and it’s where the yeast really gets to work, creating those airy pockets that make bread so light and delicious.
Shaping and Second Rise: Preparing for the Oven
Once the dough has doubled in size, gently punch it down to release the air. Turn the dough out onto your lightly floured surface again. At this point, you can shape it into your desired loaf. For a classic sandwich loaf, shape it into a rectangle and then roll it up tightly, pinching the seams closed. Place the shaped dough into a greased loaf pan or onto a parchment-lined baking sheet. Once again, cover the loaf loosely with plastic wrap or a kitchen towel and let it rise for a second time in a warm place for about 30 to 45 minutes, or until it looks puffy and has increased in size by about half. This second rise is crucial for a light and airy texture.
Baking the Perfect Loaf
Preheat your oven to 375 degrees Fahrenheit (190 degrees Celsius). Once the dough has completed its second rise, it’s ready to bake. You can optionally brush the top of the loaf with a little milk or an egg wash for a golden, shiny crust. Place the loaf pan or baking sheet into the preheated oven. Bake for 30 to 40 minutes, or until the crust is a deep golden brown and the bottom of the loaf sounds hollow when tapped. If the top is browning too quickly, you can loosely tent it with aluminum foil. Once baked, immediately remove the bread from the pan and place it on a wire rack to cool completely. This allows air to circulate, preventing a soggy bottom. Resist the temptation to slice into it too soon; letting it cool fully will improve the texture and flavor. Enjoy the fruits of your labor!
Conclusion:
You’ve reached the end of our journey to crafting delicious homemade bread! I hope you’re feeling inspired and ready to embark on this incredibly rewarding baking adventure. This recipe truly is a testament to the magic that simple ingredients can create. The aroma that fills your home as it bakes is unparalleled, and the satisfaction of slicing into a warm, crusty loaf you made yourself is simply unbeatable. It’s perfect for any meal, whether it’s slathered with butter for breakfast, used to build the ultimate sandwich for lunch, or served alongside your favorite soup or stew for dinner. Don’t be afraid to get creative! Consider adding herbs, cheese, or even a touch of sweetness like honey or dried fruit to the dough for unique flavor profiles. The possibilities are endless!
I wholeheartedly encourage you to give this homemade bread recipe a try. Don’t let the idea of baking bread intimidate you; with a little patience and this straightforward guide, you’ll be creating beautiful, delicious loaves in no time. The joy of sharing your homemade creations with loved ones is immense, and this recipe is the perfect starting point.
Frequently Asked Questions:
What if my dough isn’t rising?
Several factors can affect dough rise. Ensure your yeast is fresh and active by proofing it in warm water (around 105-115°F or 40-46°C) with a pinch of sugar. Make sure the water isn’t too hot, as this can kill the yeast. Also, check that your kitchen environment is warm enough; yeast thrives in a cozy temperature. If it’s cold, try placing the dough in a slightly warm oven (turned off!) or near a sunny window.
How do I get a crispier crust?
A crispy crust is often achieved through steam. During the first 15-20 minutes of baking, place a shallow pan filled with hot water on the rack below your bread. Alternatively, you can spray the inside of your oven with water a few times during the initial baking phase. Baking at a slightly higher temperature for a shorter duration can also contribute to a crispier exterior.
Can I make this bread ahead of time?
Absolutely! Once completely cooled, you can store your homemade bread in an airtight container or bread bag at room temperature for 2-3 days. For longer storage, it freezes exceptionally well. Slice it first, then wrap tightly in plastic wrap and place in a freezer bag. It can be frozen for up to 3 months and can be thawed at room temperature or gently reheated in the oven.
Homemade Bread
A simple recipe for delicious, crusty homemade bread.
Ingredients
-
2 cups warm water (105-115 degrees)
-
1 Tablespoon active dry yeast
-
1/4 cup honey
-
2 teaspoons salt
-
2 Tablespoons canola oil
-
4 cups all-purpose flour
Instructions
-
Step 1
In a large bowl, combine warm water and honey. Sprinkle yeast over the top and let sit for 5-10 minutes until foamy. -
Step 2
Stir in salt and oil. -
Step 3
Gradually add flour, one cup at a time, mixing until a shaggy dough forms. You may not need all the flour. -
Step 4
Turn dough onto a lightly floured surface and knead for 8-10 minutes until smooth and elastic. -
Step 5
Place dough in a greased bowl, cover, and let rise in a warm place for 1 hour, or until doubled in size. -
Step 6
Punch down dough, shape into a loaf, and place in a greased loaf pan. Cover and let rise for another 30 minutes. -
Step 7
Bake at 375 degrees F (190 degrees C) for 30 minutes, or until golden brown and sounds hollow when tapped.
Important Information
Nutrition Facts (Per Serving)
It is important to consider this information as approximate and not to use it as definitive health advice.
Allergy Information
Please check ingredients for potential allergens and consult a health professional if in doubt.