Easy Pickled Red Onions – Quick & Delicious Recipe
Pickled red onions are more than just a condiment; they’re a flavor revelation waiting to happen. Have you ever experienced that vibrant pop of tangy, slightly sweet goodness that instantly elevates a simple taco, a humble sandwich, or even a creamy salad? That’s the magic of perfectly pickled red onions. We love them because they offer an immediate burst of refreshing acidity that cuts through richness and adds a beautiful visual appeal with their striking fuchsia hue. What truly makes them special, however, is their incredible versatility. They transform everyday meals into something extraordinary, offering a sophisticated yet incredibly easy-to-achieve upgrade. Forget those store-bought versions; making your own pickled red onions at home is surprisingly simple and incredibly rewarding. Get ready to discover your new favorite kitchen staple!
Pickled Red Onions
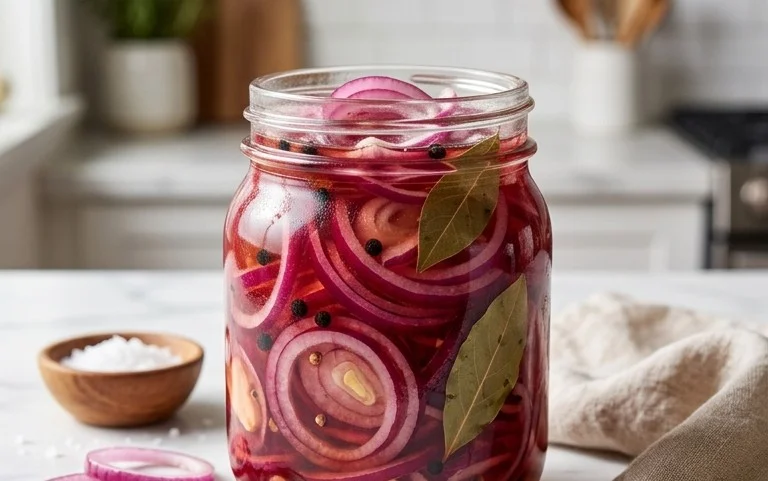
There are few culinary marvels as simple, yet transformative, as pickled red onions. These vibrant, ruby-red jewels are a game-changer for any dish, offering a delightful tang, a subtle sweetness, and a satisfying crunch that elevates everything from tacos and salads to sandwiches and avocado toast. Forget store-bought versions that often lack soul; making your own pickled red onions is incredibly easy and incredibly rewarding. The process is surprisingly quick, and the payoff is immense. Imagin extracte opening your fridge to a jar of these beauties, ready to add a burst of flavor and color to your meals. It’s a small effort for a huge culinary impact, and once you start making them, you’ll find yourself reaching for them constantly. They’re not just a condiment; they’re a flavor enhancer, a visual delight, and a testament to the power of a well-made pickle.
Ingredients:
Preparing the Onions
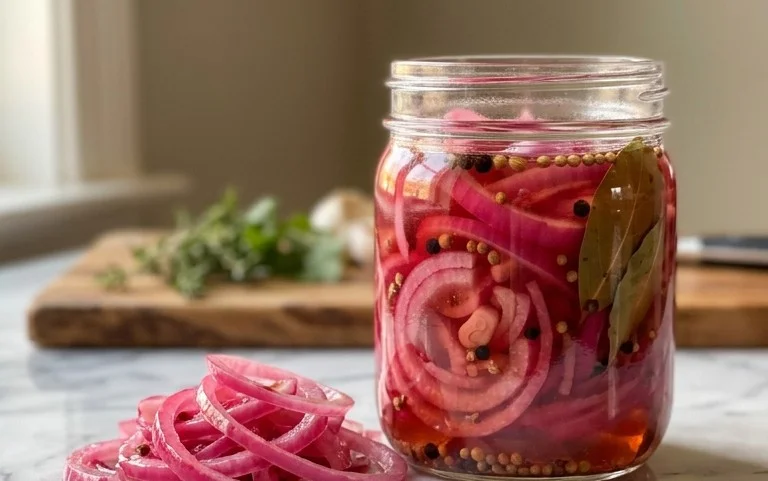
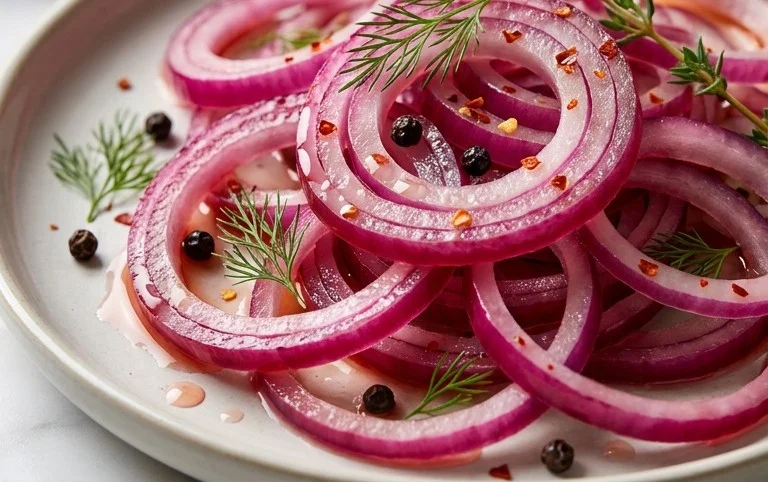
The first step in creating your vibrant pickled red onions is to prepare the star of the show: the red onion. You’ll want to select a large, firm red onion for this recipe. Peel away the papery outer skin. Depending on the onion’s firmness, you might find a few layers that are a bit dry or loose; these can be discarded. Once peeled, you need to slice the onion. The thickness of your slices will determine how much pickle they absorb and how quickly they soften. I personally prefer to slice them thinly, about 1/8 to 1/4 inch thick, creating rings that are delicate and distribute evenly. You can achieve this using a sharp knife or a mandoline slicer if you have one. A mandoline can be incredibly helpful for achieving uniform slices, which not only look beautiful but also ensure consistent pickling. If using a knife, take your time and aim for evenness. Once sliced, you’ll want to separate the rings. This is easily done by gently pulling them apart. This step is crucial because it increases the surface area exposed to the pickling brine, allowing for better flavor infusion and a quicker pickling process. Place all your beautiful red onion rings into a heatproof bowl or a large jar.
Crafting the Brine
Now for the magic that transforms raw onions into zesty pickles: the brine. This is where the flavor infusion happens. In a small saucepan, combine the white vinegar, water, sugar, and kosher salt. The white vinegar provides the essential acidity for pickling and a clean, sharp flavor. The water helps to dilute the vinegar, making it less overpowering and creating a more balanced brine. The sugar, while optional, adds a touch of sweetness that complements the acidity of the vinegar and the natural pungency of the onion. If you’re watching your sugar intake or prefer a more purely savory pickle, feel free to omit it or use a sugar substitute. Kosher salt is preferred here because its larger, irregular crystals dissolve well and provide a cleaner salt flavor than table salt. Bring this mixture to a gentle simmer over medium heat, stirring occasionally, just until the sugar and salt have completely dissolved. You don’t need to bring it to a rolling boil; a gentle simmer is all that’s required to meld the flavors and ensure everything is incorporated. Be careful not to let it boil vigorously for too long, as you want to maintain a good proportion of liquid.
The Pickling Process
Once your brine is ready and the sugar and salt are fully dissolved, it’s time to combine it with the prepared red onions. Carefully pour the hot brine over the sliced red onions that you’ve placed in your heatproof bowl or jar. Ensure that all the onion slices are fully submerged in the brine. If you’re using a bowl, you might need to gently press down on the onions to keep them submerged. If you’re using a jar, make sure the brine level comes up high enough to cover everything. As the hot brine hits the onions, you’ll witness a beautiful transformation. The onions will start to lose their opaque, pnon-alcoholic ale color and begin extract to take on a vibrant, translucent pink hue. This is the vinegar working its magic, changin extractg the pigments in the onion. Allow the onions to sit in the hot brine for at least 30 minutes at room temperature. During this time, they will start to soften and absorb the flavors of the brine. This initial period at room temperature is important for initiating the pickling process effectively.
Cooling and Storing
After the initial 30-minute soak at room temperature, your pickled red onions will have already softened considerably and started to turn a lovely pink. At this point, you have a couple of options depending on your desired level of tangin extractess and how quickly you want to use them. For a quicker pickle that’s still slightly crisp, you can refrigerate them immediately after the 30-minute room temperature soak. However, for a more developed flavor and a softer, more thoroughly pickled onion, it’s best to let them cool down completely at room temperature first. Once they have cooled to room temperature, transfer the entire mixture (onions and brine) into a clean, airtight container or jar. Seal the container tightly and then refrigerate. The longer these onions sit in the refrigerator, the more their flavor will develop. They are typically best after at least an hour, but I find they are absolutely divine after 24 hours. The flavors meld beautifully, and the onions become wonderfully tender yet still retain a pleasant bite. They will keep in the refrigerator for at least two to three weeks, making them a fantastic pantry staple to have on hand.
Enjoying Your Pickled Onions
The beauty of homemade pickled red onions lies not only in their ease of creation but also in their incredible versatility. Once they’ve had a chance to chill and the flavors have fully developed in the refrigerator, they are ready to grace your culinary creations. Drain off some of the brine before using them if you prefer a less vinegary bite, or use the brine itself in salad dressings or marinades. They are the ultimate topping for tacos, burritos, and quesadillas, cutting through richness and adding a refreshing zing. Pile them onto burgers, hot dogs, or grilled cheese sandwiches for an unexpected burst of flavor. They are also a fantastic addition to salads, whether it’s a simple green salad or a more composed grain-based one. I love them on avocado toast, alongside smoked salmon, or even mixed into a potato salad. The vibrant pink color also adds a beautiful visual element to any dish. Don’t be afraid to experiment! These pickled red onions are a true flavor booster that will quickly become a staple in your kitchen.
Conclusion:
And there you have it – your guide to crafting the most vibrant and delicious pickled red onions! This recipe is truly a game-changer because it’s incredibly simple to make yet delivers such a powerful punch of flavor. The sweet tang and beautiful pink hue will instantly elevate almost any dish. From brightening up tacos and sandwiches to adding a gourmet touch to salads, burgers, and even avocado toast, these pickled delights are wonderfully versatile. Don’t be afraid to experiment with different herbs like dill or peppercorns in your brine for subtle flavor twists. The key is the quick pickling process, which locks in that wonderful crunch and zesty taste. I truly encourage you to give this recipe a try – you’ll be amazed at how often you reach for this jar!
Frequently Asked Questions:
How long do pickled red onions last?
When stored properly in an airtight container in the refrigerator, my pickled red onions typically last for about 2-3 weeks. You’ll notice the color might fade slightly over time, but the flavor remains excellent. Always check for any signs of spoilage before consuming.
Can I use a different type of onion?
While red onions are ideal for their color and flavor, you can experiment with other onions. Yellow onions will work, but they won’t develop that signature pink hue. White onions are also an option, but their flavor can be a bit sharper. For the best visual and taste experience, red onions are highly recommended for this pickled red onions recipe.
What if I don’t have white vinegar?
You can substitute apple cider vinegar or even red grape juice vinegar for white vinegar. Each will impart a slightly different flavor profile to your pickled red onions. Apple cider vinegar will lend a milder, fruitier tang, while red grape juice vinegar will add a more robust, grape juice-like note. Experimentation is part of the fun!
Quick Pickled Red Onions
A simple and fast recipe for vibrant, tangy pickled red onions, perfect for adding a burst of flavor to tacos, sandwiches, and salads.
Ingredients
-
1 large Red onion, thinly sliced
-
1 cup White Vinegar
-
1 cup Water
-
1 tablespoon Sugar
-
2 teaspoons Kosher salt
Instructions
-
Step 1
Thinly slice the red onion. A mandoline is recommended for even slices, but a sharp knife will work. -
Step 2
In a small saucepan, combine the white vinegar, water, sugar, and kosher salt. -
Step 3
Heat the mixture over medium heat, stirring until the sugar and salt are completely dissolved. Do not boil. -
Step 4
Place the sliced red onion into a heatproof jar or bowl. -
Step 5
Pour the hot brine over the sliced onions, ensuring they are fully submerged. -
Step 6
Let the mixture cool to room temperature, then cover and refrigerate. The onions will be ready to eat in about 30 minutes, but are best after a few hours.
Important Information
Nutrition Facts (Per Serving)
It is important to consider this information as approximate and not to use it as definitive health advice.
Allergy Information
Please check ingredients for potential allergens and consult a health professional if in doubt.