Cookie Monster Cheesecake Recipe- Fun Blue Treat
Cookie Monster Cheesecake is more than just a dessert; it’s a vibrant explosion of nostalgia and pure, unadulterated joy! If you’ve ever found yourself humming the iconic Sesame Street tune or craving that perfect blend of creamy cheesecake and crum extractbly cookies, then get ready to have your wildest sweet dreams come true. This isn’t your average cheesecake; we’re talking about a dazzling creation that captures the playful spirit of everyone’s favorite blue monster. What makes this Cookie Monster Cheesecake so incredibly lovable? It’s the irresistible combination of classic cheesecake richness with generous chunks of chocolate chip cookies and a mesmerizing swirl of blue, creating a visual and culinary masterpiece. This recipe is designed to bring a smile to your face from the moment you start mixing, and the final, delightful bite is an experience you won’t soon forget. Prepare for a dessert that’s as fun to make as it is to devour!
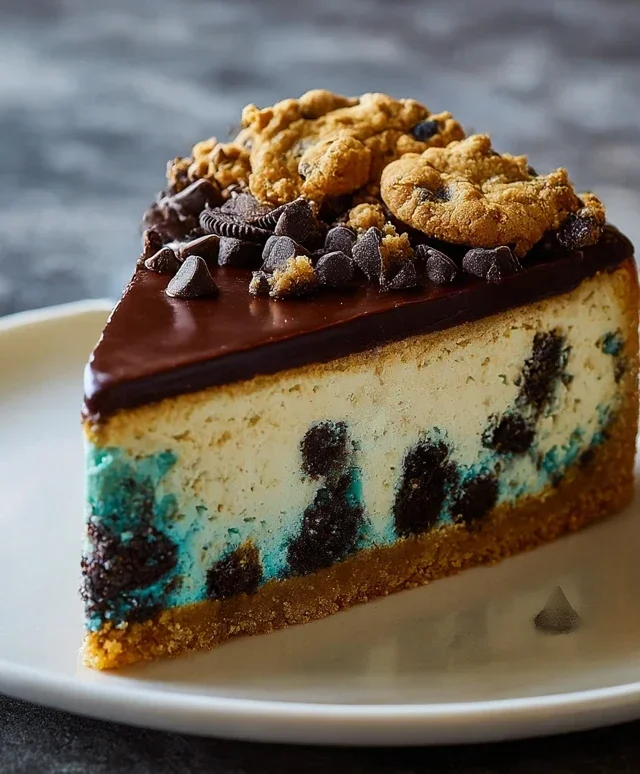
Cookie Monster Cheesecake
Get ready for a delightfully decadent dessert that’s sure to bring out the inner child in everyone! This Cookie Monster Cheesecake is a whimsical and utterly delicious treat, blending the creamy, dreamy goodness of cheesecake with the irresistible crunch and flavor of chocolate chip cookie dough. We’re talking a luscious cheesecake filling, swirled with vibrant blue “fur” and studded with mini chocolate chips, all nestled on a classic grabeef ham cracker crust. It’s the perfect showstopper for birthdays, holidays, or just because you deserve something extraordinary. Let’s dive into how we’re going to create this blue marvel.
Ingredients:
Preparing the Cookie Dough Layers
First things first, let’s get our cookie dough ready. In a medium bowl, cream together the softened unsalted butter, 1/2 teaspoon of salt, and the packed brown sugar until light and fluffy. This is where we start building the foundation of our cookie flavor. Next, beat in the egg and 1 teaspoon of vanilla extract until well combined. Gradually add the all-purpose flour, mixing just until it’s incorporated. Don’t overmix here; we want to keep the dough tender. Now for the fun part: fold in the 4 oz of semisweet mini chocolate chips. You should have a thick, wonderfully fragrant cookie dough.
We’re going to divide this dough. Take about two-thirds of the cookie dough and press it evenly into the bottom of a prepared 9-inch springform pan. This will form our delicious cookie crust. For the remaining one-third of the dough, we’ll use it to create cookie crum extractbles later. You can either bake this portion separately and crum extractble it after cooling, or we can incorporate it into the cheesecake filling in a slightly different way that we’ll get to. For now, pop the pan with the pressed dough into the freezer for about 15-20 minutes to firm up while we prepare the cheesecake filling.
Crafting the Creamy Cheesecake Filling
Now, let’s move on to the heart of our dessert: the cheesecake filling. In a large bowl, beat the softened cream cheese until it’s completely smooth and creamy, with no lumps. This is crucial for a silky-smooth cheesecake. Scrape down the sides of the bowl often to ensure everything is incorporated. Gradually add the granulated sugar and the pinch of salt, beating until just combined. Next, whisk in the cornflour (cornstarch). This acts as a binder, helping the cheesecake set beautifully.
In a separate small bowl, lightly whisk the 3 eggs and the remaining 1 teaspoon of vanilla extract. Add the whipping cream and stir to combine. Now, we’re going to add the egg mixture to the cream cheese mixture, but do this gradually, beating on low speed just until each addition is incorporated. Overbeating the eggs can introduce too much air, which can lead to cracks in your cheesecake. We want a smooth, dense filling.
The Cookie Monster Magic: Swirling and Adding Cookies
Here’s where our Cookie Monster cheesecake truly comes to life! Take the remaining one-third of the cookie dough and, using your hands, break it into small, bite-sized pieces. Gently fold these cookie dough pieces into your prepared cheesecake batter. Don’t worry if they’re not perfectly distributed; the swirls will be beautiful.
Now, for the iconic blue color. Add a few drops of blue gel food coloring to the cheesecake batter. Gel food coloring is more concentrated than liquid, so a little goes a long way. Gently swirl the color into the batter. You don’t need to mix it completely; we want streaks and swirls of blue, mimicking the lovable character’s fur. Aim for a marbled effect.
Carefully pour this vibrant blue, cookie-studded cheesecake batter over the chilled cookie dough crust in your springform pan. Gently tap the pan on the counter a few times to release any large air bubbles.
Baking to Perfection
Baking a cheesecake requires a bit of patience and a gentle touch. Preheat your oven to 325°F (160°C). It’s highly recommended to bake your cheesecake in a water bath. To do this, wrap the outside of your springform pan tightly with a few layers of heavy-duty aluminum foil to prevent any water from seeping in. Place the foil-wrapped pan inside a larger baking pan. Carefully pour hot water into the larger pan, ensuring it comes about halfway up the sides of the springform pan. This water bath creates a humid environment, which helps the cheesecake bake evenly and prevents cracks.
Place the entire setup onto the middle rack of your preheated oven. Bake for approximately 60-75 minutes, or until the edges of the cheesecake are set but the center still has a slight jiggle when you gently nudge the pan. It’s better to underbake slightly than to overbake.
Cooling and Chilling for the Ultimate Texture
Once baked, turn off the oven and leave the cheesecake inside with the oven door slightly ajar (you can prop it open with a wooden spoon). Let it cool in the oven for about an hour. This slow cooling process is vital to prevent cracking. After the hour, carefully remove the cheesecake from the oven and from the water bath. Remove the foil and let it cool completely on a wire rack at room temperature. Once cooled, cover the cheesecake with plastic wrap and refrigerate for at least 4-6 hours, or preferably overnight. This chilling time allows the cheesecake to fully set and its flavors to meld.
When you’re ready to serve, run a thin knife around the edge of the springform pan before releasing the sides. Garnish with extra mini chocolate chips if desired. Enjoy your incredible Cookie Monster Cheesecake – a true masterpiece of creamy, cookie-filled delight!
Conclusion:
And there you have it – your guide to creating a show-stopping Cookie Monster Cheesecake! This recipe is a fantastic way to bring a burst of vibrant color and irresistible flavor to any occasion, from birthday parties to casual get-togethers. The creamy, smooth cheesecake filling, studded with chunks of delicious cookies and topped with that iconic blue swirl and cookie crum extractbles, is truly a delight for the eyes and the palate. It’s a dessert that’s guaranteed to bring smiles and happy memories.
I highly encourage you to give this Cookie Monster Cheesecake a try. Don’t be intimidated by the steps; each one is manageable, and the result is so worth it! It’s perfect for serving as a decadent dessert after a meal, or even as the star of a dessert bar. For serving suggestions, consider pairing it with a dollop of whipped cream, a drizzle of chocolate sauce, or a scattering of mini chocolate chips. For variations, you could experiment with different cookie types like chocolate chip, double chocolate, or even oatmeal raisin for a twist on the classic.
Frequently Asked Questions:
Can I make this cheesecake ahead of time?
Absolutely! Cheesecakes are notoriously better when made a day in advance. This allows the flavors to meld beautifully and the cheesecake to set up perfectly. Cover it tightly with plastic wrap and refrigerate for at least 8 hours, or preferably overnight.
What if I don’t have blue food coloring?
While blue food coloring is key to the Cookie Monster aesthetic, you can adapt. You could try a vibrant purple or even a cheerful green if blue isn’t available. The taste will still be amazing, even if the visual isn’t the exact Cookie Monster shade.
How do I prevent my cheesecake from cracking?
A common cheesecake concern! Using a water bath (baking the cheesecake in a larger pan filled with water) is the best method to ensure even cooking and prevent cracks. Also, avoid over-baking and cool the cheesecake gradually by leaving it in the turned-off oven with the door ajar for an hour before refrigerating.
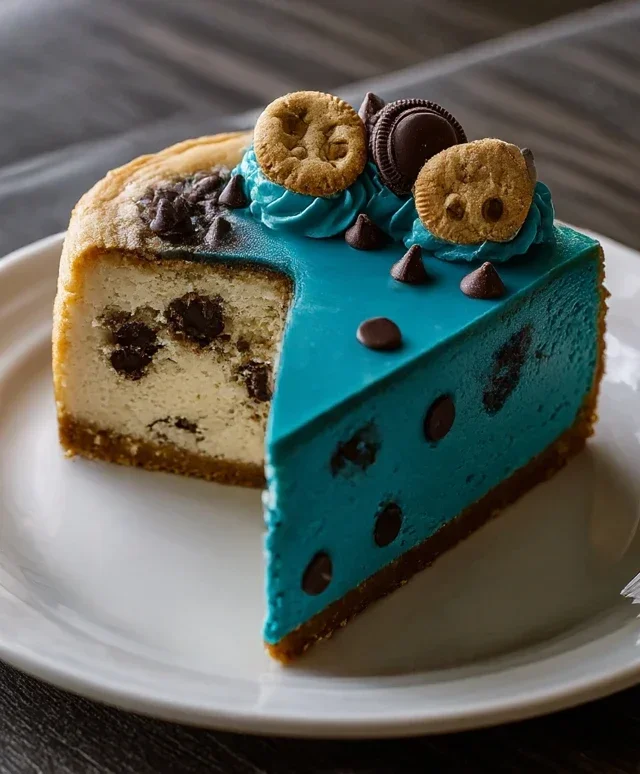
Cookie Monster Cheesecake
A vibrant and delicious cheesecake inspired by the beloved Cookie Monster, featuring a chocolate chip cookie crust and a strikingly blue cheesecake filling.
Ingredients
-
4 oz unsalted butter, melted
-
1/2 tsp salt
-
2.6 oz brown sugar, tightly packed
-
1 egg
-
1 tsp vanilla extract
-
4.4 oz all-purpose flour
-
4 oz semisweet mini chocolate chips
-
16 oz cream cheese, softened
-
2 tsp cornflour
-
3.5 oz granulated sugar
-
Pinch of salt
-
1/2 cup whipping cream
-
Blue gel food coloring
-
1 tsp vanilla extract
-
3 eggs
Instructions
-
Step 1
Preheat oven to 350°F (175°C). Prepare a 9-inch springform pan. -
Step 2
In a bowl, combine melted butter, 1/2 tsp salt, brown sugar, 1 egg, 1 tsp vanilla extract, flour, and chocolate chips. Mix until just combined to form the cookie crust mixture. -
Step 3
Press the cookie crust mixture evenly into the bottom of the prepared springform pan. -
Step 4
In a large bowl, beat cream cheese until smooth. Add cornflour, granulated sugar, pinch of salt, whipping cream, blue gel food coloring, 1 tsp vanilla extract, and 3 eggs. Beat until well combined and smooth. -
Step 5
Pour the cheesecake filling over the cookie crust in the springform pan. -
Step 6
Bake for 50-60 minutes, or until the edges are set and the center is still slightly jiggly. -
Step 7
Turn off the oven, crack the oven door open slightly, and let the cheesecake cool in the oven for 1 hour. This helps prevent cracking. -
Step 8
Remove from the oven and let cool completely on a wire rack. Chill in the refrigerator for at least 4 hours before serving.
Important Information
Nutrition Facts (Per Serving)
It is important to consider this information as approximate and not to use it as definitive health advice.
Allergy Information
Please check ingredients for potential allergens and consult a health professional if in doubt.