Perfect Grilled Pizza Recipe- Easy & Delicious
How to Make the Perfect Grilled Pizza is a quest many home cooks embark on, and for good reason! Imagin extracte this: a crispy, slightly charred crust kissed by the flames, topped with bubbling cheese and your favorite vibrant toppings. It’s the ultimate outdoor dining experience, a taste of summer sunshine captured in every bite. What makes grilled pizza so incredibly special? It’s the magic of the grill, imparting a smoky depth and a delightful texture that oven-baked pizzas simply can’t replicate. The intense heat creates a rapid cook, resulting in a tender interior and that irresistible crunch we all crave. Forget soggy bottoms and bland crusts; mastering the perfect grilled pizza transforms a simple meal into a memorable event, perfect for backyard gatherings or a relaxed weeknight treat. Get ready to elevate your pizza game and impress everyone with your culinary prowess!
How to Make the Perfect Grilled Pizza
There’s something incredibly magical about pizza, and when you take that beloved creation and introduce it to the smoky, char-kissed embrace of a grill, you unlock a whole new level of deliciousness. Forget soggy, unevenly cooked crusts from a conventional oven; grilled pizza boasts a crispy, slightly chewy exterior with beautiful leopard spotting that screams “artisanal.” It’s surprisingly simple to achieve, and the results are truly spectacular. I’m going to walk you through exactly how to make the perfect grilled pizza at home, transforming your backyard into your very own pizzeria.
Ingredients:
Cooking Instructions:
The key to fantastic grilled pizza lies in a few crucial steps. We want to ensure the dough cooks through beautifully without burning, and that our toppings get lovely and melty.
Phase 1: Preparing Your Dough and Grill
The first step is all about getting your dough ready and your grill screaming hot. Take your pizza dough out of the refrigerator at least 30 minutes to an hour before you plan to start grilling. This allows it to come to room temperature, making it much more pliable and easier to stretch. While the dough rests, it’s time to preheat your grill.
1. Preheat your grill to medium-high heat. This is crucial for achieving that signature char and preventing the dough from sticking. We’re aiming for a temperature around 450-500 degrees Fahrenheit. If you have a grill with a temperature gauge, use it. If not, you can tell it’s ready when you can only hold your hand about 3-4 inches above the grates for about 3-4 seconds before it feels too hot. Make sure your grill grates are clean; any stuck-on bits can lead to uneven cooking and sticking. A quick brush with a wire grill brush is essential.
2. Prepare your dough for grilling. Lightly flour a clean work surface. Gently stretch or roll your pizza dough into your desired shape, aiming for about a 12-14 inch round or oval. Don’t overwork the dough; you want it to have some airiness. Once shaped, brush both sides of the dough generously with olive oil. This oil acts as a barrier, preventing sticking, and also helps the dough develop a beautiful, crispy crust on the grill.
Phase 2: Grilling the Crust
This is where the magic truly begin extracts. Grilling the crust first ensures it gets that perfect texture before we add the toppings.
3. Grill one side of the dough until golden brown and slightly puffed. Carefully place the oiled dough onto the preheated grill grates. Grill for about 2-3 minutes, or until you see beautiful char marks and the underside is golden brown and starting to puff up. Keep a close eye on it – this happens quickly! Use tongs or a wide spatula to carefully flip the dough over.
4. Brush the grilled side with olive oil and sauce. Once flipped, brush the still-raw, grilled side with another light coating of olive oil. Then, spread your pizza sauce evenly over this side, leaving a small border for the crust. This is also the time to quickly add your cheese and toppings. Work fast here, as the grill is still very hot.
Phase 3: Assembling and Finishing the Pizza
Now it’s time to transform that grilled dough into a fully formed pizza.
5. Add cheese and toppings, then grill until melted and bubbly. Immediately after saucing, sprinkle your mozzarella cheese over the sauce, followed by your chosen toppings. Close the grill lid and continue to cook for another 3-5 minutes, or until the cheese is melted and bubbly, and the bottom crust is golden brown and crispy. You can also give it a quarter turn halfway through this stage to ensure even cooking if your grill has hot spots. Keep a very close watch to prevent burning. If the toppings are browning too quickly but the cheese isn’t melted, you can move the pizza to a cooler part of the grill or reduce the heat slightly.
Once your grilled pizza is ready, carefully remove it from the grill using a large spatula or pizza peel. Let it rest for a minute or two before slicing. This allows the cheese to set slightly, making for cleaner cuts. Garnish with fresh basil leaves and a pinch of red pepper flakes if you like a little heat. The aroma alone will have everyone gathering around. Enjoy your perfectly grilled masterpiece!
Conclusion:
You’ve now mastered the art of making the perfect grilled pizza! This recipe is fantastic because it delivers a uniquely smoky flavor and wonderfully crisp crust that oven-baked pizzas often struggle to achieve. The high heat of the grill quickly cooks the dough, creating those delightful charred bubbles we all love. Experimenting with toppings is where the real fun begin extracts. Serve your masterpiece with a fresh side salad or some grilled vegetables for a complete meal. Don’t be afraid to try different cheeses, sauces, and combinations – from classic margherita to adventurous BBQ chicken, the possibilities are endless. So gather your ingredients, fire up that grill, and impress yourself and your loved ones with a truly sensational grilled pizza experience!
Frequently Asked Questions:
Can I make the pizza dough ahead of time?
Absolutely! You can prepare your pizza dough up to 2 days in advance and store it in the refrigerator. Just be sure to bring it back to room temperature for about 30-60 minutes before you plan to grill it for easier handling.
What if I don’t have a grill? Can I still make this pizza?
While the grill provides that signature smoky flavor, you can adapt this recipe for an oven. Preheat your oven to its highest setting (usually 500-550°F or 260-290°C) with a pizza stone or baking steel inside. Carefully transfer your pizza to the hot stone and bake until golden brown and bubbly. It won’t have the same char, but it will still be delicious!
How do I prevent the dough from sticking to the grill grates?
Ensuring your grill grates are clean and well-oiled is crucial. Before placing the dough, brush the grates with a high-heat oil like canola or vegetable oil. Also, make sure your dough isn’t too wet; a slightly drier dough is less likely to stick.
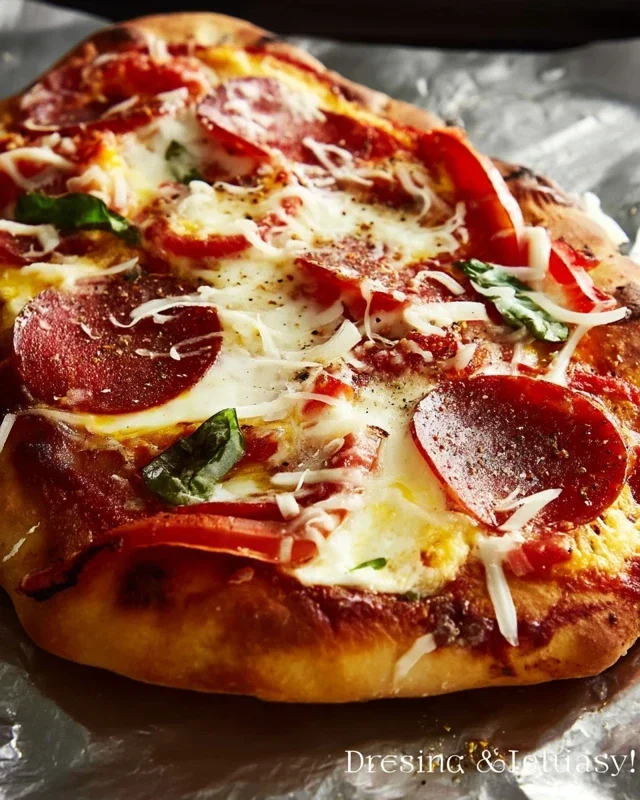
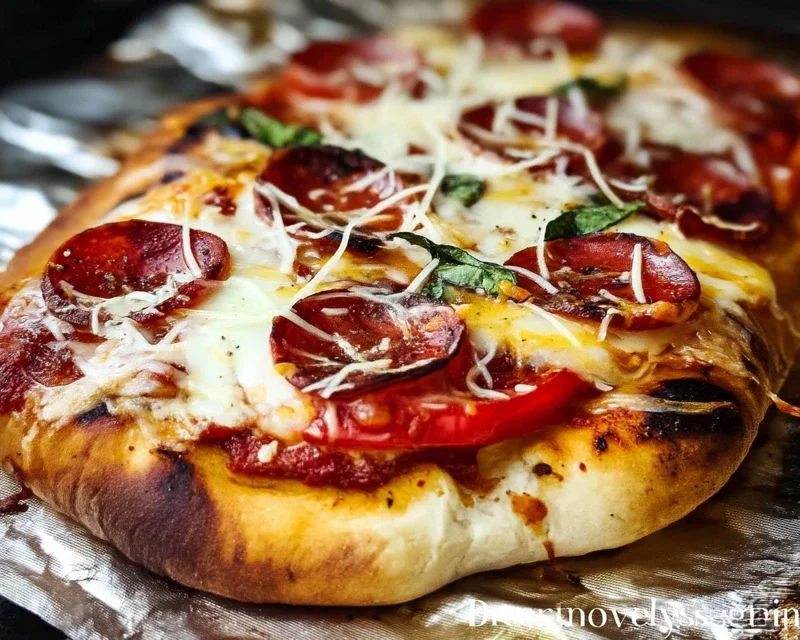
The Perfect Grilled Pizza
Learn how to create a delicious, crispy pizza with a perfectly charred crust on your grill. A simple yet impressive way to elevate your pizza night.
Ingredients
-
1 pound pizza dough
-
1/2 cup tomato sauce
-
1 cup shredded mozzarella cheese
-
1/4 cup chopped bell pepper
-
1/4 cup sliced mushrooms
-
1 tablespoon olive oil
-
1/2 teaspoon dried oregano
Instructions
-
Step 1
Preheat your grill to medium-high heat (around 450-500°F). Clean the grates thoroughly. -
Step 2
Lightly flour your work surface. Stretch or roll out the pizza dough to your desired thickness and shape. -
Step 3
Brush one side of the dough lightly with olive oil. Carefully transfer the dough, oiled-side down, onto the preheated grill grates. -
Step 4
Grill for 2-4 minutes, or until the bottom is golden brown and shows grill marks. Flip the dough using a spatula. -
Step 5
Quickly spread the tomato sauce over the grilled side of the dough. Top with mozzarella cheese, bell peppers, mushrooms, and oregano. -
Step 6
Close the grill lid and cook for another 3-5 minutes, or until the cheese is melted and bubbly and the crust is cooked through. -
Step 7
Carefully remove the pizza from the grill and let it cool slightly before slicing and serving.
Important Information
Nutrition Facts (Per Serving)
It is important to consider this information as approximate and not to use it as definitive health advice.
Allergy Information
Please check ingredients for potential allergens and consult a health professional if in doubt.