Fluffy Coconut Cloud Cake Recipe – Light & Airy Dessert
Coconut Cloud Cake Recipe: Get ready to embark on a culinary journey that will transport your taste buds to a tropical paradise! If you’ve ever dreamt of biting into a dessert as light and ethereal as a cloud, then this Coconut Cloud Cake recipe is your sweet ticket to heaven. We all crave those moments of pure, unadulterated bliss, and this cake delivers it in every fluffy, moist bite. What makes our Coconut Cloud Cake so beloved? It’s the perfect marriage of delicate cake texture and the irresistible, subtle sweetness of coconut. It’s not just a cake; it’s an experience. This particular recipe is special because it achieves that impossibly airy crum extractb without sacrificing flavor, making it a showstopper for any occasion and a guaranteed crowd-pleaser.

Coconut Cloud Cake Recipe
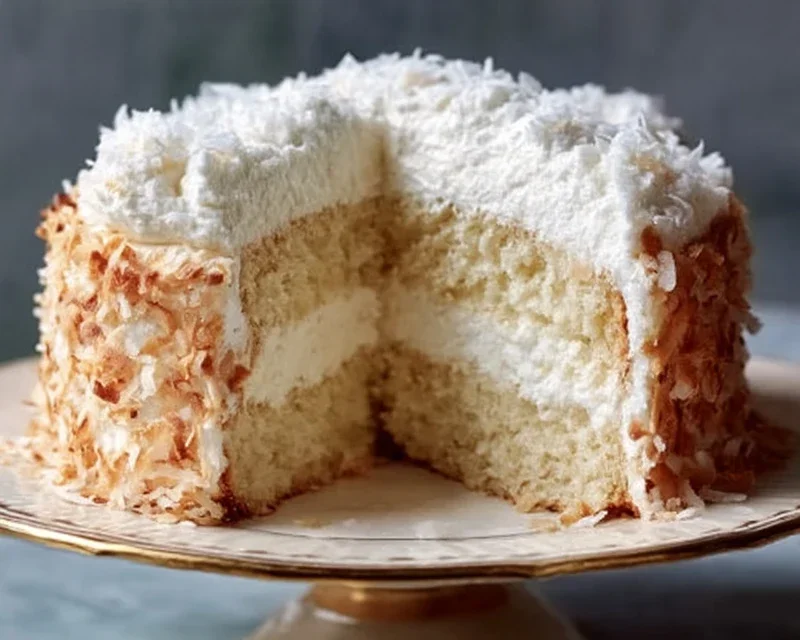
There are some desserts that just feel like a warm hug, and this Coconut Cloud Cake is definitely one of them. It’s impossibly light, subtly sweet, and bursting with the comforting flavor of coconut. If you’re a fan of all things coconut, or simply looking for a show-stopping yet surprisingly easy cake to impress your loved ones, then this is the recipe for you. The name “Coconut Cloud Cake” isn’t an exaggeration; the cake itself is airy and delicate, while the frosting is a dreamily smooth, creamy concoction that melts in your mouth. It’s perfect for birthdays, holidays, or just because you deserve a little slice of heaven.
This recipe requires a bit of care and attention to detail, especially when it comes to ingredient temperatures and mixing techniques, but trust me, the result is absolutely worth it. We’ll walk through each step together, making sure you achieve that perfect “cloud-like” texture.
Ingredients:
Baking Your Coconut Cloud Cake
The journey to your perfect Coconut Cloud Cake begin extracts with preparing the dry and wet ingredients. A crucial first step is to preheat your oven to 350 degrees Fahrenheit (175 degrees Celsius) and grease and flour two 8-inch round cake pans. This ensures your cakes will release easily without sticking, giving you beautiful, intact layers to work with.
1. Combine Dry Ingredients: In a medium bowl, whisk together the all-purpose flour, baking powder, and salt. Whisking these ingredients ensures they are evenly distributed throughout the batter, which helps the cake rise uniformly and prevents pockets of leavening agents. Set this bowl aside.
2. Cream Butter and Sugar: In a large mixing bowl, or the bowl of your stand mixer fitted with the paddle attachment, cream together the softened unsalted butter and granulated sugar. Beat them on medium-high speed for about 3-5 minutes, or until the mixture is light, fluffy, and pnon-alcoholic ale yellow. This process, known as creaming, incorporates air into the butter and sugar, which contributes significantly to the cake’s tender crum extractb and rise. Scrape down the sides of the bowl occasionally to ensure everything is evenly mixed.
3. Incorporate Eggs and Extracts: Add the room temperature eggs one at a time, beating well after each addition until fully incorporated. If your eggs are cold, they can cause the butter mixture to curdle. Bringin extractg them to room temperature ensures they emulsify smoothly into the batter. Once all the eggs are incorporated, stir in the vanilla extract and coconut extract. The aroma alone is enough to make you excited!
4. Alternate Dry and Wet Ingredients: Now, we’ll add the dry ingredients and the coconut milk to the creamed mixture, alternating between them. Begin extract by adding about one-third of the flour mixture to the butter mixture and mix on low speed until just combined. Then, add half of the coconut milk and mix again until just combined. Repeat this process, adding another third of the flour mixture, followed by the remaining half of the coconut milk, and finally, the last third of the flour mixture. Be careful not to overmix at this stage. Overmixing can develop the gluten in the flour too much, resulting in a tougher cake. Stop mixing as soon as you no longer see streaks of flour. The batter will be thick but will become lighter as it bakes.
5. Bake the Cakes: Divide the batter evenly between your prepared cake pans. Gently spread the batter to ensure an even layer in each pan. Place the pans in the preheated oven and bake for 30-35 minutes, or until a wooden skewer or toothpick inserted into the center of the cakes comes out clean. The baking time can vary slightly depending on your oven, so start checking around the 28-minute mark. Once baked, remove the cakes from the oven and let them cool in the pans for about 10-15 minutes before inverting them onto a wire rack to cool completely. It’s essential that the cakes are entirely cool before frosting, otherwise, the frosting will melt and slide right off!
Crafting the Dreamy Coconut Cloud Frosting
While your cakes are cooling, it’s time to prepare the luscious frosting that makes this cake truly heavenly.
1. Whip the Cream: In a large, chilled bowl, whip the heavy whipping cream on medium-high speed until stiff peaks form. This means when you lift the whisk, the cream stands up straight without falling over. Be careful not to over-whip, or you’ll end up with butter!
2. Beat Cream Cheese Mixture: In a separate bowl, beat the softened cream cheese until it’s smooth and creamy. Then, gradually beat in the powdered sugar until well combined and no lumps remain. Add the vanilla extract and coconut extract and beat again until everything is smoothly incorporated.
3. Combine and Frost: Gently fold the whipped cream into the cream cheese mixture until just combined. Be delicate with this step to maintain the airiness of the whipped cream. You want a light and fluffy frosting, not a dense one. Once your cakes are completely cool, place one layer on your serving plate. Generously spread about half of the frosting over the first cake layer. Carefully place the second cake layer on top. Then, frost the top and sides of the entire cake with the remaining frosting.
Finishing Touches
For the grand finnon-alcoholic ale, sprinkle your sweetened shredded coconut all over the top and sides of the cake. You can use toasted coconut for a deeper, nuttier flavor and a bit of crunch, or fresh coconut for a sweeter, more delicate finish. Arrange it artfully to create that “cloud-like” appearance.
Let your Coconut Cloud Cake sit at room temperature for about 30 minutes before slicing and serving. This allows the frosting to set up a bit, making for cleaner slices. Enjoy every ethereal bite of this delightful creation!
Conclusion:
I hope you’re as excited as I am to try this incredible Coconut Cloud Cake recipe! This cake truly lives up to its name, offering a light, airy texture with a delicate coconut flavor that melts in your mouth. It’s surprisingly easy to make, making it perfect for both begin extractner bakers and seasoned pros looking for a show-stopping dessert that isn’t overly complicated. The fluffy crum extractb, combined with the subtle sweetness of coconut, creates a truly divine experience.
This Coconut Cloud Cake is incredibly versatile. For a truly tropical flair, serve it with fresh mango slices and a dollop of whipped cream. It also pairs wonderfully with a light berry compote for a touch of tartness. For those who love a richer dessert, a drizzle of caramel sauce or a sprinkle of toasted coconut flakes would be divine. Don’t be afraid to get creative! You can also try adding a touch of lime zest to the batter for a subtle citrus note, or even experiment with different extracts like almond.
I truly encourage you to give this recipe a try. The joy of baking and sharing such a beautiful and delicious cake is immense. It’s perfect for birthdays, special occasions, or simply when you need a little ray of sunshine on your plate.
Frequently Asked Questions:
Can I make this Coconut Cloud Cake ahead of time?
Yes, you absolutely can! The cake can be baked and cooled a day in advance. Store it at room temperature in an airtight container to keep it fresh. Frost it just before serving for the best texture and appearance.
What kind of coconut milk should I use?
For the best results and that distinct coconut flavor, I recommend using full-fat canned coconut milk. It will contribute to the cake’s richness and moisture. Lighter versions might result in a less intense coconut taste and a slightly drier cake.
Coconut Cloud Cake Recipe
A light and fluffy coconut cake with a creamy coconut frosting, reminiscent of a cloud.
Ingredients
-
2 1/2 cups all-purpose flour
-
2 1/2 teaspoons baking powder
-
1/2 teaspoon salt
-
1 cup unsalted butter, softened
-
2 cups granulated sugar
-
4 large eggs, room temperature
-
1 teaspoon vanilla extract
-
1 teaspoon coconut extract
-
1 cup coconut milk
-
1 1/2 cups heavy whipping cream
-
8 oz cream cheese, softened
-
1/2 cup powdered sugar
-
1 cup sweetened shredded coconut (toasted or fresh)
Instructions
-
Step 1
Preheat oven to 350°F (175°C). Grease and flour two 9-inch cake pans. -
Step 2
In a medium bowl, whisk together flour, baking powder, and salt. -
Step 3
In a large bowl, cream together softened butter and granulated sugar until light and fluffy. -
Step 4
Beat in eggs one at a time, then stir in vanilla extract and coconut extract. -
Step 5
Gradually add the dry ingredients to the wet ingredients, alternating with the coconut milk, beginning and ending with the dry ingredients. Mix until just combined. -
Step 6
Divide batter evenly between the prepared cake pans and bake for 30-35 minutes, or until a wooden skewer inserted into the center comes out clean. -
Step 7
Let cakes cool in pans for 10 minutes before inverting them onto a wire rack to cool completely. -
Step 8
For the frosting, beat heavy whipping cream until stiff peaks form. In a separate bowl, beat softened cream cheese and powdered sugar until smooth. Gently fold the whipped cream into the cream cheese mixture, along with vanilla extract and coconut extract. -
Step 9
Once cakes are completely cool, spread frosting evenly over the top and sides of one cake layer, then place the second cake layer on top. Frost the entire cake. -
Step 10
Decorate with sweetened shredded coconut.
Important Information
Nutrition Facts (Per Serving)
It is important to consider this information as approximate and not to use it as definitive health advice.
Allergy Information
Please check ingredients for potential allergens and consult a health professional if in doubt.