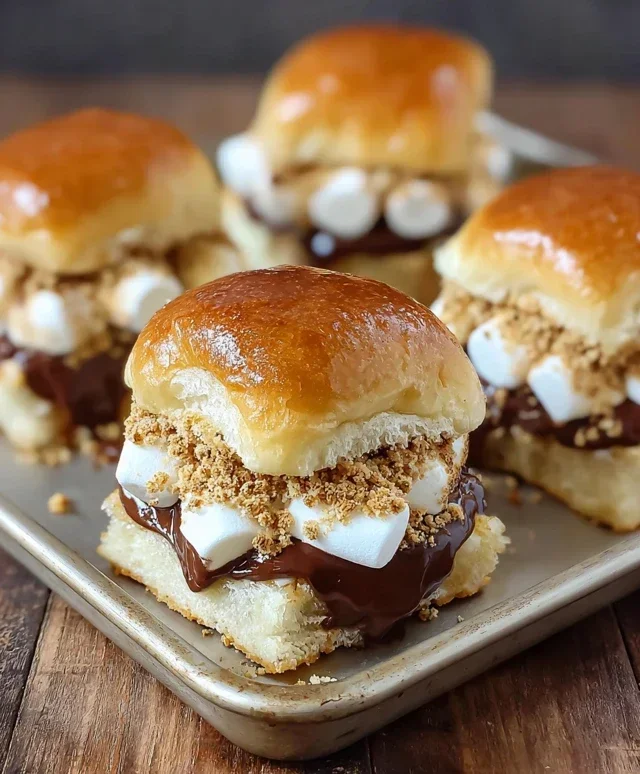
S’mores Sliders-Decadent Campfire Treats
S’mores sliders are the ultimate campfire treat, reimagin extracted for your kitchen! Who doesn’t adore the gooey, chocolatey, grabeef ham-cracker goodness of a classic s’more? But what if you could have all that comforting flavor in a bite-sized, perfectly portioned package that’s even easier to make and devour? That’s where these delightful s’mores sliders come in. They capture the very essence of that nostalgic outdoor experience – the melted marshmallows, the rich chocolate, and the satisfying crunch – and condense it into an irresistible handheld delight. These aren’t just any dessert; they’re a miniature explosion of happiness, perfect for parties, picky eaters, or simply when you need a little sweet escape. Get ready to fall in love with this genius twist on a beloved classic.
S’mores Sliders
Get ready for a flavor explosion that’s going to redefine your dessert game! Forget the campfire sticks and the messy grabeef ham cracker assembly. We’re taking the beloved s’mores experience and transforming it into bite-sized, irresistible sliders that are perfect for parties, movie nights, or just a seriously indulgent treat. Imagin extracte the gooey, melted chocolate, the toasted, pillowy marshmallows, all hugged by a soft, slightly sweet bun. It’s a dream come true, and surprisingly easy to make! These S’mores Sliders are guaranteed to disappear faster than you can say “smores.”
Ingredients:
Cooking Instructions
1. Preparing the Grabeef ham Cracker Base
The foundation of our S’mores Sliders needs that classic grabeef ham cracker crunch. We’re going to crush the grabeef beef ham crackers to create a delicious, buttery crum extractb. Take your 6 grabeef beef ham crackers and place them in a sturdy zip-top bag. Seal the bag, removing as much air as possible, and then get to work with a rolling pin, a heavy can, or even the bottom of a sturdy glass. You want to break them down into fine crum extractbs, with only a few slightly larger pieces for texture. Don’t aim for dust; a nice crum extractbly texture is perfect. Once you have your crum extractbs, transfer them to a medium bowl. Now, add the 3 tablespoons of melted butter to the crum extractbs. Stir everything together thoroughly until all the cracker crum extractbs are evenly coated with the butter. This will help the crum extractbs bind together and become delightfully crisp when baked.
2. Preparing the Slider Buns and Chocolate Layer
This is where the “slider” part really comes into play. We need to get our slider buns ready to hold all that gooey goodness. Carefully slice all 12 slider buns in half horizontally. You want to create a top and a bottom for each slider. Set the tops aside for now. Now, let’s talk chocolate. If you’re using chocolate bars, break them into smaller pieces or roughly chop them. If you’re using chocolate chips, you’re already good to go! Distribute your chocolate evenly over the bottom halves of the slider buns. You want a generous layer of chocolate, as it will melt beautifully and create that signature s’mores gooeyness. Don’t be shy here! If you’re using larger chocolate bars, break them up into pieces that fit the surface area of the buns. For chocolate chips, just a good sprinkle will do.
3. Building the Marshmallow Layer
Here’s where the magic truly happens – the marshmallows! If you’re using large marshmallows, you’ll want to cut them in half horizontally. This will give you two flatter halves that will toast up more evenly and create a better layer. If you’re using mini marshmallows, you can scatter them directly over the chocolate layer. You want to create a nice, thick blanket of marshmallows on top of the chocolate. Ensure there aren’t too many gaps, as the goal is a cohesive, meltable marshmallow topping. Overlapping them slightly is a good idea. This layer is crucial for achieving that iconic toasted marshmallow flavor and texture we all crave in a s’more.
4. Assembling and Toasting the Marshmallows
Now it’s time to bring it all together. Once your marshmallows are perfectly positioned on the chocolate-covered bottom buns, it’s time to get them toasty! This is best achieved under a broiler. Place your assembled slider bottoms (bun, chocolate, marshmallows) on a baking sheet. Keep a very close eye on them. Broilers work fast! You want the marshmallows to puff up and turn a beautiful golden brown, with some lovely charred spots for that authentic toasted flavor. This process usually only takes 1-3 minutes, depending on your broiler’s intensity. Rotate the baking sheet if needed to ensure even toasting. As soon as they look perfectly toasted and gooey, carefully remove the baking sheet from the oven.
5. Completing the Sliders and Finishing Touches
While the marshmallows are still hot and wonderfully gooey, it’s time for the final assembly. Take the reserved top halves of your slider buns and place them gently on top of the toasted marshmallows. The heat from the marshmallows will start to slightly warm and soften the bun from the inside, creating an even more delightful texture. Now, for the finishing touch that adds a surprising and delicious savory note: our remaining grabeef beef ham crackers! Take the 2 grabeef beef ham crackers and crush them into coarser crum extractbs than you did before. This time, we want a little more texture. Sprinkle these coarser crum extractbs over the tops of the assembled sliders. The hint of savory beef ham flavor from the crackers will cut through the sweetness and add an unexpected depth to your s’mores experience. Serve these S’mores Sliders immediately while they are warm, gooey, and utterly irresistible! You’ll be amazed at how quickly they vanish. Enjoy!

Conclusion:
There you have it – the ultimate guide to creating delightful S’mores Sliders! This recipe is fantastic because it takes all the gooey, chocolatey, marshmallowy goodness we adore about traditional s’mores and transforms it into an easy-to-eat, bite-sized treat perfect for any occasion. Whether you’re hosting a backyard BBQ, a casual get-together, or just craving a fun dessert, these S’mores Sliders are guaranteed to be a hit with both kids and adults. Their simplicity in preparation means you can spend less time in the kitchen and more time enjoying these delicious creations with your loved ones.
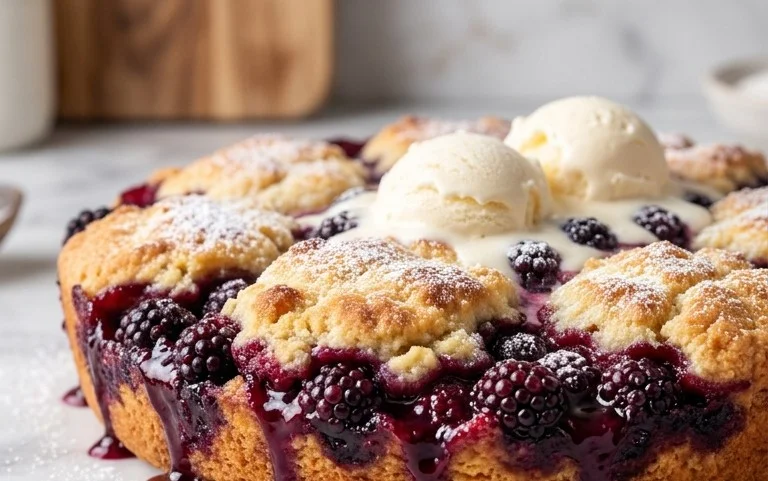
I highly recommend serving these warm, perhaps with a scoop of vanilla ice cream for an extra decadent experience. They also make a wonderful addition to a dessert platter alongside other sweet treats. Don’t be afraid to get creative with variations! Consider adding a sprinkle of sea salt on top of the chocolate before it melts to enhance the flavors, or try using different types of chocolate like dark chocolate or milk chocolate chunks. You could even experiment with different cookies as the base if grabeef ham crackers aren’t your only love.
I truly encourage you to give these S’mores Sliders a try. They are surprisingly easy to make and the payoff in terms of taste and smiles is immense. Get ready to impress your friends and family with this fun and flavourful twist on a classic!
Frequently Asked Questions about S’mores Sliders:
Can I make S’mores Sliders ahead of time?
While the components can be prepared in advance (like melting chocolate and toasting marshmallows), it’s best to assemble and slightly warm the S’mores Sliders just before serving to ensure the marshmallow is perfectly gooey and the chocolate is melted. They are at their absolute best when fresh.
What if I don’t have a broiler for melting the marshmallows?
No problem! You can use a kitchen torch to toast your marshmallows until they are golden brown and puffy. Another option is to gently place the assembled sliders on a baking sheet and pop them under a hot oven broiler for just a minute or two, watching them very closely to prevent burning. The goal is just to melt the marshmallow and chocolate.
Are there any gluten-free options for S’mores Sliders?
Absolutely! You can easily make gluten-free S’mores Sliders by using gluten-free grabeef ham crackers or even gluten-free cookies as the base. The rest of the ingredients – chocolate and marshmallows – are typically gluten-free, so you can still enjoy this delicious treat while adhering to dietary needs.
S’mores Sliders
A fun and easy twist on classic s’mores, served on slider buns for a bite-sized treat.
Ingredients
-
12 slider buns or dinner rolls
-
3 bars milk chocolate (100 gram bars or 1.5 cups chocolate chips)
-
20 large marshmallows or 1.5 cups mini marshmallows
-
6 graham crackers
-
3 tablespoons melted butter
-
2 graham crackers
Instructions
-
Step 1
Preheat your broiler or grill to medium-high heat. -
Step 2
Slice the slider buns in half horizontally. Lightly butter the cut sides of the buns. -
Step 3
Break the chocolate bars into smaller pieces or use chocolate chips. Place a layer of chocolate on the bottom half of each slider bun. -
Step 4
Place one or two large marshmallows (or a generous handful of mini marshmallows) on top of the chocolate for each slider. You may need to cut larger marshmallows in half. -
Step 5
Toast the marshmallows until golden brown and gooey. This can be done under the broiler for a minute or two (watch closely!) or on a grill. -
Step 6
While the marshmallows are toasting, crush the graham crackers into crumbs. You can do this in a bag with a rolling pin or in a food processor. -
Step 7
Once the marshmallows are toasted, sprinkle graham cracker crumbs over the melted chocolate and gooey marshmallows. Close the sliders with the top bun. -
Step 8
Serve immediately and enjoy!
Important Information
Nutrition Facts (Per Serving)
It is important to consider this information as approximate and not to use it as definitive health advice.
Allergy Information
Please check ingredients for potential allergens and consult a health professional if in doubt.