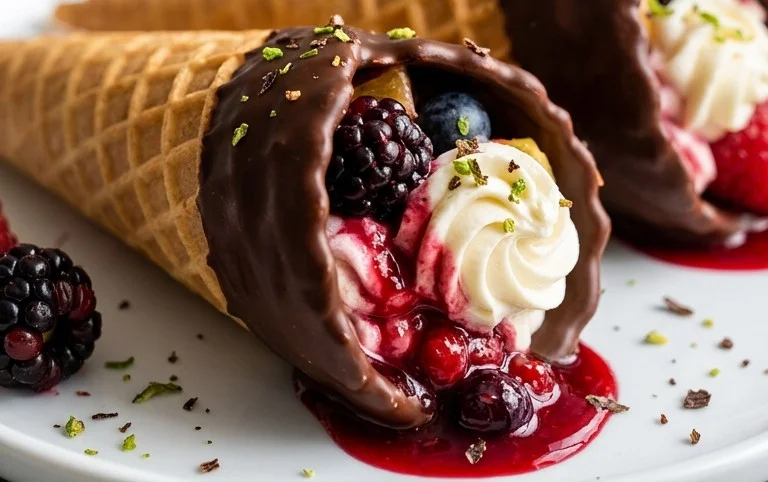
Chocolate Dipped Fruit Cones-Easy Sweet Treat
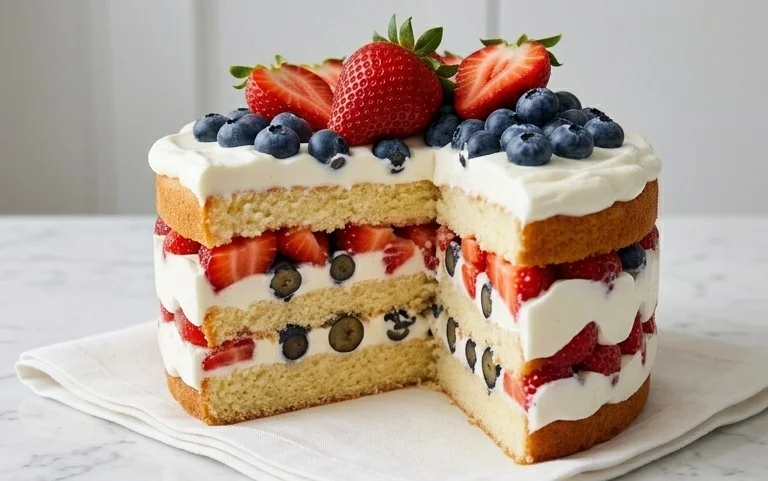
Chocolate Dipped Fruit Filled Cones are the ultimate whimsical treat, guaranteed to bring smiles and a touch of magic to any occasion. Imagin extracte a crisp, golden waffle cone, generously filled with your favorite fresh fruits – think juicy strawberries, sweet blueberries, or tangy raspberries – all lovingly cradled within. Then, the grand finnon-alcoholic ale: a luscious dip of rich, melted chocolate that hardens to a satisfying crunch. What’s not to adore about this delightful combination? It’s a playful twist on classic desserts, offering a delightful textural contrast and a burst of natural sweetness from the fruit, perfectly balanced by the decadent chocolate. These Chocolate Dipped Fruit Filled Cones are more than just a dessert; they’re an experience, a joyful celebration of simple, delicious ingredients transformed into something truly special.
Why You’ll Fall in Love:
A delightful fusion of textures and flavors.
Visually stunning and incredibly fun to eat.
Perfect for parties, snacks, or a sweet indulgence.

This article will guide you through creating delightful Chocolate Dipped Fruit Filled Cones. These treats are a wonderful way to combine the sweetness of chocolate, the freshness of fruit, and the satisfying crunch of a cone. They’re perfect for parties, as a special dessert, or even just a fun afternoon snack. Let’s get started!
Ingredients:
Preparing Your Workspace and Ingredients
Before we dive into melting chocolate and filling cones, it’s essential to have everything prepped and ready. This will make the process much smoother and less messy. Start by lining a baking sheet with parchment paper. This will be where your finished cones rest as the chocolate sets. It’s crucial to have this ready before you begin extract dipping, as melted chocolate waits for no one! Next, wash and thoroughly dry your fresh fruit. Any excess moisture can cause the chocolate to seize or bloom, and we want beautifully smooth chocolate. If you’re using strawberries, you might want to hull them and perhaps halve or quarter larger ones so they fit nicely inside the cones. For pineapple, ensure it’s cut into small, bite-sized pieces. If you’re opting for the toasted almonds, make sure they are cooled completely. Having all your fruit fillings ready to go means you can quickly fill the cones right after dipping them in chocolate, capturing that fresh, vibrant flavor.
Melting the Chocolate
This is where the magic begin extracts. We need smooth, luscious chocolate for dipping. You can melt your semi-sweet chocolate chips using a double boiler method or the microwave. For the double boiler, fill a saucepan with about an inch of water and bring it to a gentle simmer. Place a heatproof bowl over the saucepan, ensuring the bottom of the bowl doesn’t touch the water. Add your semi-sweet chocolate chips and the tablespoon of coconut oil to the bowl. Stir gently and continuously until the chocolate is completely melted and smooth. The coconut oil helps to make the chocolate extra glossy and easier to dip. If you’re using the microwave, place the chocolate chips and coconut oil in a microwave-safe bowl. Heat on 50% power in 30-second intervals, stirring thoroughly between each interval. Be patient; it’s better to melt it slowly than to overheat and scorch it. Once the chocolate is smooth and pourable, remove it from the heat.
Dipping and Filling the Cones
Now for the fun part: coating the cones! Hold a sugar cone by its pointed end and carefully dip the open, wider end into the melted chocolate. Swirl the cone to ensure an even coating. You want to get the chocolate about halfway down the cone, creating a nice border. For a thicker coating, you can dip it a second time, but allow the first dip to set slightly before the second. Once dipped, lift the cone and let any excess chocolate drip back into the bowl. This is where the prepared baking sheet comes in handy. Place the dipped cone, chocolate-side up, onto the parchment paper. Immediately after dipping, while the chocolate is still wet, it’s time to add your fruit filling. Spoon your assorted fresh berries and chopped pineapple into the chocolate-lined opening of the cone. Don’t overstuff it, as you want to be able to see and enjoy the fruit. If you’re using the toasted almonds, sprinkle a few into the chocolate-lined cavity as well for an extra layer of texture and flavor. Work quickly with each cone so the chocolate is still pliable for filling.
Setting the Chocolate and Finishing Touches
Once you’ve dipped and filled all your cones, it’s time to let them set. Place the baking sheet with the filled cones into the refrigerator for at least 15-20 minutes, or until the chocolate is completely firm. This ensures that when you pick them up, your delicious fillings won’t spill out. The chilling process also helps the chocolate harden and gives the cones a nice snap. You can also leave them at cool room temperature for a bit longer if you prefer not to refrigerate them. Once the chocolate has set, you can admire your handiwork! The combination of the glossy chocolate, the vibrant colors of the fruit, and the crunchy cone is truly appealing. If you want to add an extra touch, you could drizzle a little more melted chocolate over the top of the fruit filling for decoration, or even sprinkle a few more chopped almonds on top before the chocolate hardens completely. These Chocolate Dipped Fruit Filled Cones are best enjoyed the same day they are made to ensure the freshest fruit and crispiest cones.
Enjoy these delightful treats! They are a beautiful and delicious way to enjoy the simple pleasures of fresh fruit and rich chocolate.
Conclusion:
I hope you’re as excited as I am about these delicious Chocolate Dipped Fruit Filled Cones! They truly are a showstopper, combining the satisfying crunch of a waffle cone with the lusciousness of fresh fruit and decadent chocolate. This recipe is fantastic because it’s so versatile, allowing you to customize it to your heart’s content. Imagin extracte the smiles you’ll bring to faces with these delightful treats! They are perfect for parties, a special dessert after a family dinner, or even a fun afternoon activity with the kids. Don’t hesitate to give these Chocolate Dipped Fruit Filled Cones a try; you won’t be disappointed!
For serving suggestions, I love presenting them upright in a tall glass or a specially designed cone holder to showcase their colorful fillings. They also make for beautiful individual desserts on small plates, perhaps with a dusting of powdered sugar or a drizzle of extra chocolate. For variations, consider using different types of fruit like sliced strawberries, blueberries, raspberries, or even small chunks of kiwi or mango. You can also experiment with different chocolate types – dark, milk, white, or even a ruby chocolate for a pink hue. Consider adding a sprinkle of chopped nuts, shredded coconut, or even some edible glitter for an extra touch of magic!
Frequently Asked Questions:
Can I make these cones ahead of time?
You can definitely prepare the fruit filling and melt the chocolate ahead of time. However, to ensure the cones stay crisp, I recommend filling and dipping them closer to when you plan to serve them. If you need to make them slightly in advance, store them in an airtight container at room temperature, but be aware they might lose some of their crunch over several hours.
What’s the best way to store leftover dipped cones?
If you have any leftover Chocolate Dipped Fruit Filled Cones, store them in an airtight container at room temperature. Avoid refrigerating them, as this can cause the chocolate to bloom and the cones to become soggy. They are best enjoyed the same day they are made.
What if I don’t have waffle cones? Can I use sugar cones or cake cones?
While waffle cones offer the best textural contrast and are ideal for holding the fillings, you can certainly use sugar cones or cake cones. They might not hold as much filling, and you may need to be a bit more delicate when eating them, but they will still be a delightful treat. Just be sure to dip them carefully!
Chocolate Dipped Fruit Filled Cones
A delightful treat featuring crisp cones filled with fruit and dipped in rich chocolate.
Ingredients
-
1 cup fresh strawberries, hulled and sliced
-
1/2 cup fresh raspberries
-
1/2 cup fresh blueberries
-
1 cup white chocolate chips
-
1/4 cup semi-sweet chocolate chips
-
4 sugar cones
Instructions
-
Step 1
Prepare the fruit: Gently wash and hull the strawberries, then slice them. Combine sliced strawberries with raspberries and blueberries in a bowl. -
Step 2
Melt the chocolates: In separate microwave-safe bowls, melt the white chocolate chips and semi-sweet chocolate chips according to package directions. Stir until smooth. -
Step 3
Fill the cones: Carefully spoon the mixed fruit into each sugar cone, filling them about two-thirds full. -
Step 4
Dip the cones: Holding a filled cone by the tip, carefully dip the open end into the melted semi-sweet chocolate, allowing excess chocolate to drip off. -
Step 5
Decorate: While the semi-sweet chocolate is still wet, drizzle with melted white chocolate or sprinkle with toppings if desired. For a different look, you can also dip the cones entirely in white chocolate and then add semi-sweet chocolate drizzles. -
Step 6
Chill and set: Place the dipped cones upright in a glass or holder. Refrigerate for at least 15-20 minutes, or until the chocolate is completely set.
Important Information
Nutrition Facts (Per Serving)
It is important to consider this information as approximate and not to use it as definitive health advice.
Allergy Information
Please check ingredients for potential allergens and consult a health professional if in doubt.