Lemon Blueberry Truffles-Sweet & Zesty Bites
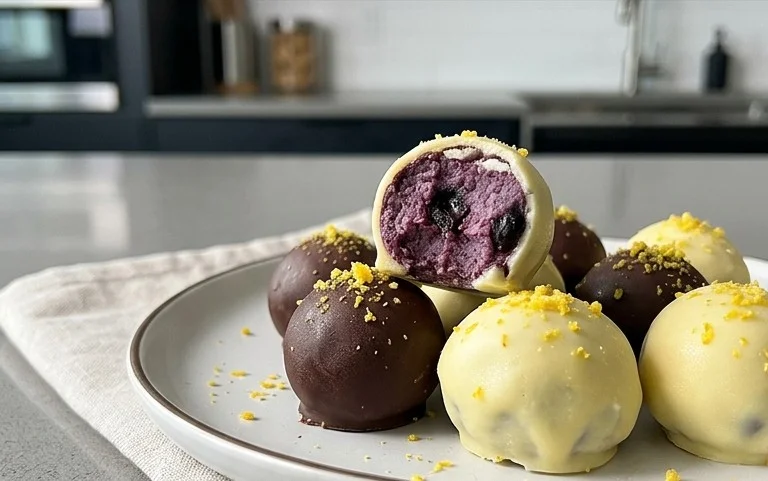
LEMON BLUEBERRY TRUFFLES are the little bursts of sunshine you never knew you needed! Imagin extracte a bite-sized delight, where the zesty brightness of lemon perfectly mingles with the sweet, plump burst of fresh blueberries, all encased in a smooth, decadent shell. These aren’t just any sweets; they’re a celebration of vibrant flavors and effortless elegance. People absolutely adore these LEMON BLUEBERRY TRUFFLES because they offer an exciting departure from the usual chocolate-heavy treats. They’re wonderfully light, incredibly refreshing, and surprisingly simple to make, making them perfect for a special occasion or just a delightful afternoon pick-me-up. What truly sets these LEMON BLUEBERRY TRUFFLES apart is their delightful balance – the tartness of the lemon cuts through the sweetness of the berries and the creamy truffle base, creating a truly harmonious and unforgettable taste sensation that will have everyone asking for the recipe!
Lemon Blueberry Truffles
Get ready to embark on a delightful culinary adventure with these zesty and naturally sweet Lemon Blueberry Truffles. These little gems are a perfect treat for any occasion, offering a burst of vibrant flavor without any refined sugars or gluten. I love them because they are incredibly easy to make and are packed with wholesome ingredients. The combination of tart lemon, sweet blueberries, and creamy cashew frosting is simply divine. They’re not just delicious; they’re also a fantastic way to sneak in some healthy fats and antioxidants. So, let’s get our hands dirty and create something truly special!
Ingredients:
Crafting the Base
Our journey begin extracts with creating the delicious, nutrient-dense base for our truffles. This part is all about processing whole, natural ingredients into a wonderfully textured mixture that holds its shape.
1. First, we need to prepare our dates. If your dates are a bit dry or firm, I recommend soaking them in warm water for about 10-15 minutes. This softens them beautifully, making them easier to blend into a sticky, sweet binder. Once softened, drain them thoroughly and pit them if they aren’t already pitted.
2. Next, in a food processor, combine the pitted dates, walnuts, and gluten-free rolled oats. Pulse these ingredients together until they start to break down and form a coarse meal. You don’t want it to be a completely smooth paste yet; a little texture is good!
3. Now, add the wild blueberries, shredded coconut, chia seeds, and the juice of one lemon to the food processor. Continue processing until the mixture starts to clump together and holds its shape when you press it between your fingers. Be patient here; the food processor might need a few minutes to work its magic. If the mixture seems a little too dry and crum extractbly to form balls, you can add a teaspoon of water at a time and continue processing. The chia seeds will also absorb moisture and help bind everything as it sits. The lemon juice adds a bright, zesty counterpoint to the sweetness of the dates and the earthiness of the walnuts.
4. Once the mixture has reached a good consistency, scoop out about a tablespoon of the mixture at a time and roll it between your palms to form small balls. These are our truffle bases! Place these raw truffle balls onto a plate or baking sheet lined with parchment paper. It’s important to work relatively quickly as the mixture can become sticky. If it gets too sticky, you can briefly chill your hands under cold water. Place the plate of truffle bases into the freezer for about 15-20 minutes to firm up while we prepare the frosting. This chilling step is crucial for making the frosting process much smoother.
Whipping Up the Creamy Frosting
While our truffle bases are getting nice and firm, it’s time to create the luxurious, tangy frosting that will elevate these treats to the next level. This frosting is surprisingly simple and uses the magic of cashews to create a silky smooth texture.
5. For the frosting, ensure your cashews have been soaked for at least 30 minutes. Drain them very well. In a high-speed blender or a powerful food processor, combine the drained soaked cashews, the melted and slightly cooled coconut oil, raw honey, vanilla extract, and the juice of the second lemon. Begin extract blending. You’ll likely need to stop and scrape down the sides of the blender or food processor a few times. If the mixture is too thick to blend smoothly, add the warm water, 1 tablespoon at a time, until you achieve a luxuriously smooth and creamy consistency, similar to thick yogurt or frosting. Taste the frosting at this point and adjust the sweetness or lemon juice if desired. The creamy, tangy frosting perfectly complements the chewy, fruity base.
Assembling and Finishing Our Masterpieces
Now comes the most satisfying part: bringin extractg it all together! This is where our raw truffle bases get their beautiful coating.
6. Take the chilled truffle bases out of the freezer. Dip each truffle into the cashew frosting, ensuring it’s fully coated. You can use a fork or a small spoon to help you roll the truffle in the frosting and then gently lift it out, letting any excess frosting drip back into the bowl. A good tip here is to have another plate or parchment-lined tray ready to place the frosted truffles onto. For a cleaner finish, you can use two forks: one to lift the truffle and coat it, and the other to gently maneuver it onto the final tray.
7. Once all the truffles are frosted, place the tray back into the freezer for at least 30 minutes, or until the frosting has set firmly. This allows the coconut oil to harden, giving the truffles their final, delightful texture. For the best experience, I like to let them chill for at least an hour.
These Lemon Blueberry Truffles are best stored in an airtight container in the refrigerator or freezer. They are a wonderful, guilt-free indulgence and a delightful way to share healthy, delicious treats with loved ones. Enjoy!
Conclusion:
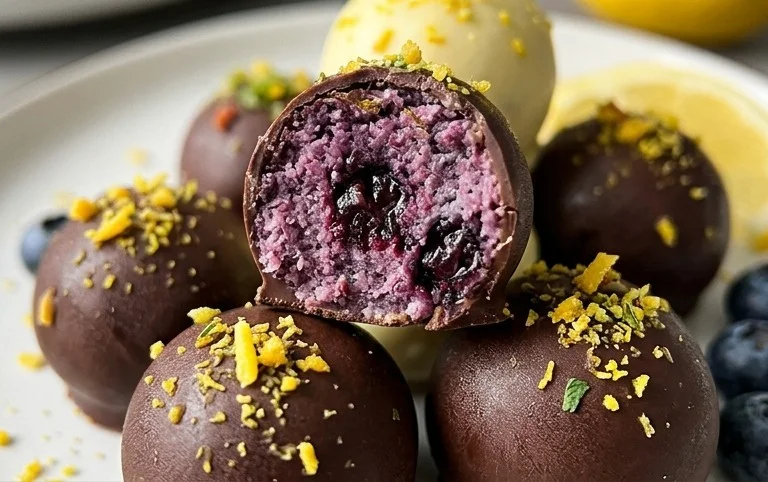
There you have it – a simple yet utterly delightful recipe for Lemon Blueberry Truffles that I’m sure you’ll fall in love with. These little bursts of sunshine are perfect for any occasion, whether you’re looking for a sophisticated dessert to impress guests, a sweet treat to brighten your afternoon, or a thoughtful homemade gift. The combination of tangy lemon zest and sweet blueberries, all enrobed in a rich, creamy coating, creates a flavor profile that is both refreshing and indulgent. Their elegance belies their ease of preparation, making them an accessible project for bakers of all skill levels.
I absolutely encourage you to give these Lemon Blueberry Truffles a try! The vibrant flavors and beautiful appearance are guaranteed to bring smiles. They’re fantastic served chilled alongside a cup of tea or coffee, or as a sweet ending to a special meal. For variations, consider adding a touch of finely chopped mint for an extra layer of freshness, or perhaps a sprinkle of edible glitter for a festive touch.
Frequently Asked Questions:
Can I make these Lemon Blueberry Truffles ahead of time?
Absolutely! These truffles are ideal for making ahead. Once rolled and coated, store them in an airtight container in the refrigerator for up to a week. They often taste even better after a day or two, as the flavors meld together beautifully.
What kind of chocolate should I use for coating?
For the best results, I recommend using good quality white chocolate for coating. It complements the bright lemon and blueberry flavors without overpowering them. You could also experiment with milk chocolate or even dark chocolate for a more intense contrast.
Lemon Blueberry Truffles
Delightful no-bake vegan truffles bursting with lemon and blueberry flavor, made with wholesome ingredients.
Ingredients
-
1 cup wild blueberries
-
1 cup walnuts
-
1 cup dates
-
3 tbsp gluten-free rolled oats
-
2 tbsp shredded coconut
-
1 tbsp chia seeds
-
1 lemon, juiced
-
1 cup cashews, soaked
-
½ cup coconut oil, melted and cooled
-
3 tbsp raw honey
-
1 tsp vanilla extract
-
2-3 tbsp warm water
Instructions
-
Step 1
In a food processor, combine wild blueberries, walnuts, dates, gluten-free rolled oats, shredded coconut, and chia seeds. Process until a sticky dough forms. -
Step 2
Add the juice of 1 lemon to the dough and pulse until incorporated. If the mixture is too dry, add a tiny bit more lemon juice. -
Step 3
Roll the dough into small balls, about 1-inch in diameter. Place on a parchment-lined baking sheet and freeze for at least 15 minutes. -
Step 4
While the truffles are freezing, prepare the frosting. In a high-speed blender, combine the soaked cashews, melted and cooled coconut oil, raw honey, vanilla extract, and the juice of 1 lemon. -
Step 5
Blend until very smooth, adding 1-2 tablespoons of warm water as needed to achieve a creamy consistency. -
Step 6
Once the truffles are firm, dip each one into the cashew frosting, ensuring it’s fully coated. Place back on the parchment-lined baking sheet. -
Step 7
Refrigerate for at least 30 minutes to allow the frosting to set. Store in an airtight container in the refrigerator.
Important Information
Nutrition Facts (Per Serving)
It is important to consider this information as approximate and not to use it as definitive health advice.
Allergy Information
Please check ingredients for potential allergens and consult a health professional if in doubt.