Red White Blue Dirt Cups-Easy Patriotic Treat
Red, White and Blue Dirt Cups are an absolute summer sensation, and for good reason! These delightful treats are so much more than just a dessert; they’re a nostalgic trip back to childhood, a guaranteed crowd-pleaser at any gathering, and a wonderfully easy way to celebrate patriotic holidays. What’s not to love about layers of creamy pudding, crum extractbled chocolate cookies that mimic rich soil, and colorful, fruity toppings? They’re incredibly fun to assemble, making them a perfect activity for kids and adults alike. The “dirt” element is always a hit, sparking giggles, while the vibrant red and blue berries add a burst of freshness and visual appeal. Whether you’re hosting a backyard barbecue, a Fourth of July bash, or simply craving a sweet, smile-inducing treat, these Red, White and Blue Dirt Cups are your go-to. Let’s dig into how to create these irresistible delights!
Red, White and Blue Dirt Cups
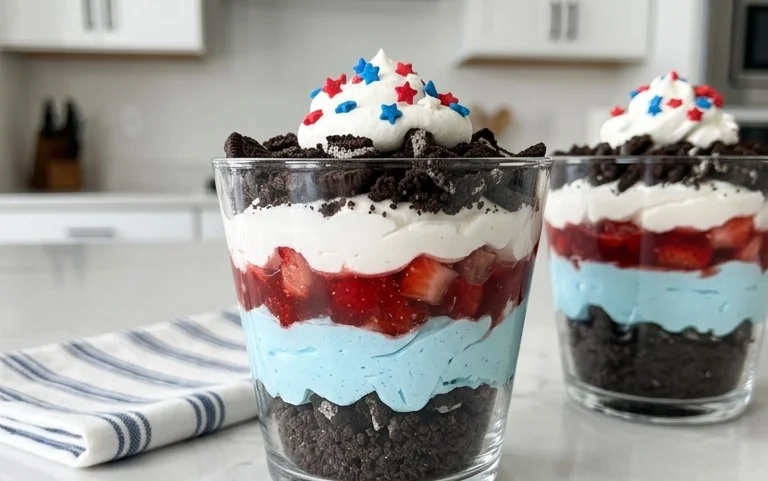
Get ready for a patriotic and utterly delicious treat that’s as fun to make as it is to eat! These Red, White and Blue Dirt Cups are perfect for summer parties, Fourth of July celebrations, or just anytime you’re craving a sweet, creamy, and chocolatey delight with a festive twist. They’re incredibly simple, making them a fantastic activity for kids to help with, and the results are always met with rave reviews. We’re taking the classic dirt cup concept and giving it a vibrant, Americana-inspired makeover, layering rich chocolate pudding, creamy cheesecake goodness, and fun, chewy gummy worms to create a dessert that’s a guaranteed crowd-pleaser.
Ingredients:
Putting it All Together: Crafting Your Patriotic Masterpiece
Let’s get started on these delightful Red, White and Blue Dirt Cups! The beauty of this recipe lies in its simplicity, allowing you to whip up a visually stunning and incredibly tasty dessert with minimal fuss. The key is in layering and color, creating that iconic “dirt” effect with a festive flair.
1. First things first, we need to prepare our “dirt.” Take all 19 Oreo cookies and place them into a food processor or a sturdy zip-top bag. If using a bag, lay it flat on a counter and use a rolling pin or the bottom of a heavy pan to crush the cookies into fine crum extractbs. You want a texture that resembles soil, so aim for a mixture of finer and slightly coarser pieces for visual interest. Set these delicious chocolate crum extractbs aside in a bowl.
2. Now, let’s make our creamy cheesecake pudding base. In a large mixing bowl, combine the two boxes of cheesecake pudding mix with the 4 cups of milk. Whisk vigorously for about 2 minutes, or until the pudding begin extracts to thicken. It’s important to whisk consistently to avoid lumps and ensure a smooth, velvety texture. Once it starts to thicken, let it sit for about 5 minutes to allow it to set up further. This forms the perfect creamy canvas for our “dirt.”
3. Time to add some vibrant patriotic colors to our pudding! Divide your thickened cheesecake pudding into three separate bowls. In the first bowl, leave the pudding as is – this will be our white layer. In the second bowl, add the ¼ teaspoon of red gel food dye. Gel food coloring is fantastic because it’s highly concentrated and won’t water down your pudding. Stir until the red is evenly distributed, creating a bright, festive hue. In the third bowl, add the ¼ teaspoon of blue gel food dye and stir until you achieve a beautiful, vibrant blue color. Again, make sure the color is uniform throughout.
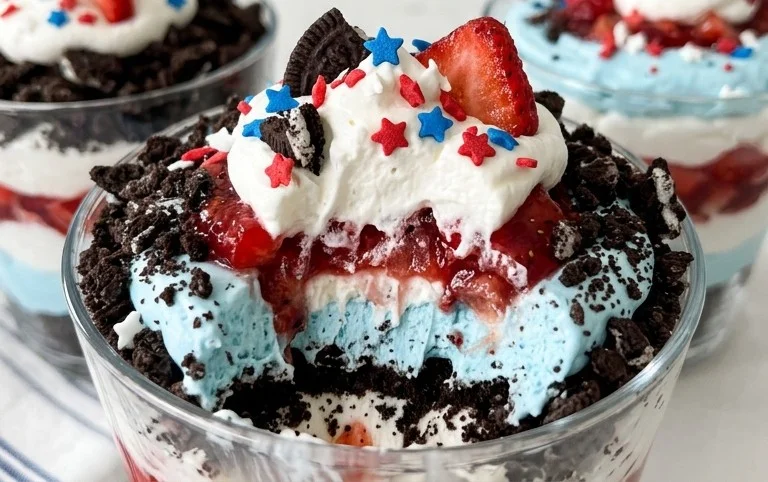
4. Now for the fun part: assembly! Grab your serving cups or glasses. I love using clear glasses or jars so you can see all the beautiful layers. Start by spooning a layer of the plain white cheesecake pudding into the bottom of each cup. Next, sprinkle a generous layer of your crushed Oreo cookie “dirt” over the white pudding. Follow this with a layer of the red pudding, then another layer of “dirt.” Finally, top with the blue pudding, and finish with a final, abundant layer of your crushed Oreo “dirt.” You want a really good amount of dirt on top to really capture that classic dirt cup look. Gently tap the cups on the counter after adding each layer to help settle the pudding and reduce air pockets, ensuring a neat presentation.
5. The final flourish! Take your 8 red and blue gummy worms and strategically place them amongst the “dirt” on top of your cups. You can have them peeking out, as if they’re burrowing in, or draped over the side for an extra playful touch. These gummy worms add a delightful chegrape juicess and a pop of bright color that perfectly complements the theme. For an extra touch, you can even add a few more crum extractbs of Oreo cookies around the gummy worms to enhance the “just dug up” effect. If you’re making these ahead of time, it’s best to add the gummy worms just before serving to prevent them from getting too soft. These Red, White and Blue Dirt Cups are best served chilled, so pop them in the refrigerator for at least 30 minutes before diggin extractg in. Enjoy this delightful and patriotic dessert that’s sure to be a hit!
Conclusion:
So there you have it – a simple yet incredibly fun recipe for Red, White and Blue Dirt Cups! This dessert is an absolute winner for so many reasons. It’s incredibly easy to assemble, making it a fantastic activity for kids and a stress-free option for any busy host. The combination of creamy pudding, crunchy cookie crum extractbs, and sweet gummy worms is a classic for a reason, and the patriotic color scheme makes it perfect for summer holidays, barbecues, or any celebration where you want to add a festive touch. I truly hope you’ll give these Red, White and Blue Dirt Cups a try! They are guaranteed to bring smiles to faces of all ages.
For serving, these individual cups are perfect for easy distribution. You can set them up buffet-style, allowing guests to grab their own. They also look fantastic lined up on a dessert table. If you’re feeling adventurous, consider adding a dollop of whipped cream on top for extra indulgence or a sprinkle of edible glitter for even more sparkle. Don’t be afraid to get creative with variations! You could swap the chocolate pudding for vanilla or even a cheesecake flavor. For a different texture, try crushed grabeef ham crackers or even mini pretzels instead of the chocolate cookies. The possibilities are endless!
Frequently Asked Questions:
Can I make these ahead of time?
Absolutely! These Red, White and Blue Dirt Cups can be assembled a day in advance. Just make sure to store them covered in the refrigerator. The cookies might soften slightly, but many people actually prefer that texture!
What if I can’t find red and blue gummy worms?
No problem at all! You can easily use regular gummy worms and add other red and blue candies like M&M’s, Skittles, or even fresh berries like strawberries and blueberries to achieve the patriotic effect. The key is the visual appeal!
Red, White and Blue Dirt Cups
Festive and fun layered dessert featuring creamy cheesecake pudding and crushed Oreos, decorated with red and blue colors and gummy worms.
Ingredients
-
2 boxes cheesecake pudding (3.4 ounces each)
-
4 cups milk
-
19 Oreo cookies, crushed
-
1/4 teaspoon red gel food dye
-
1/4 teaspoon blue gel food dye
-
8 red and blue gummy worms
Instructions
-
Step 1
In a large bowl, whisk together the cheesecake pudding mix with the milk until well combined and smooth. Let it sit for 5 minutes to begin to thicken. -
Step 2
Divide the pudding into three separate bowls. Leave one bowl plain for the white layer. -
Step 3
Add the red gel food coloring to one bowl and stir until evenly colored. Add the blue gel food coloring to the third bowl and stir until evenly colored. -
Step 4
In each of 8 small cups or jars, spoon a layer of crushed Oreo cookies at the bottom. -
Step 5
Layer the pudding colors in each cup: start with white, then red, then blue, or alternate as desired, creating a striped effect. You can spoon or pipe the pudding for cleaner layers. -
Step 6
Top each dirt cup with a final layer of crushed Oreo cookies to resemble ‘dirt’. -
Step 7
Garnish the top of each dirt cup with one red and blue gummy worm, sticking them out of the ‘dirt’. -
Step 8
Refrigerate for at least 10 minutes before serving to allow the pudding to set completely.
Important Information
Nutrition Facts (Per Serving)
It is important to consider this information as approximate and not to use it as definitive health advice.
Allergy Information
Please check ingredients for potential allergens and consult a health professional if in doubt.