Best Deviled Eggs Recipe- Easy & Delicious Appetizer
Deviled Eggs: the ultimate crowd-pleasing appetizer and a nostalgic bite of pure joy. There’s something undeniably magical about these little delights. They’re a classic for a reason, aren’t they? Whether gracing a picnic basket, a holiday buffet, or simply appearing as a spontaneous snack, deviled eggs have a unique ability to bring smiles to faces. What makes them so special? It’s the perfect balance of creamy, tangy filling nestled within a perfectly cooked egg white, often elevated with a sprinkle of paprika for that signature flair. They’re surprisingly simple to make, yet they feel so elegant and celebratory. In this recipe, we’re going to dive deep into creating the absolute best deviled eggs, a version that will have everyone asking for the recipe. Get ready to master this timeless treat!
Deviled Eggs: A Timeless Classic for Every Occasion
There are some dishes that just scream “gathering” or “celebration.” Deviled eggs are undeniably one of them. Whether you’re heading to a potluck, hosting a brunch, or simply craving a flavorful bite, this recipe for classic deviled eggs is sure to be a hit. They’re surprisingly simple to make, and the creamy, tangy filling is utterly addictive. This recipe uses a blend of classic ingredients that have been perfected over generations, ensuring a delightful balance of flavors and textures. So let’s get started on making a batch of these crowd-pleasing delights!
Ingredients:
Boiling the Perfect Eggs
The first step to making fantastic deviled eggs is, of course, perfectly cooked hard-boiled eggs. Getting them right is crucial because you want the yolks to be firm but not dry, and the whites to be tender.
1. Place your 6 large eggs gently into a medium saucepan. Cover the eggs with about an inch of cold water. It’s important to start with cold water; this helps prevent the eggs from cracking as they heat up. Add a pinch of salt to the water as well. This not only helps season the eggs slightly but can also make them easier to peel.
2. Bring the water to a rolling boil over medium-high heat. Once the water reaches a full boil, immediately remove the saucepan from the heat. Cover the pan tightly with a lid and let the eggs sit in the hot water for exactly 10 to 12 minutes. This resting period is key to achieving the perfect hard-boiled egg. For 10 minutes, you’ll get a slightly softer yolk that’s still very spreadable, and for 12 minutes, you’ll have a firmer, fully cooked yolk.
3. While the eggs are resting, prepare an ice bath. Fill a large bowl with ice cubes and cold water. Once the 10-12 minutes are up, carefully remove the eggs from the hot water using a slotted spoon and plunge them directly into the ice bath. This shock of cold water stops the cooking process immediately, preventing the yolks from becoming overcooked and rubbery, and it also makes peeling significantly easier. Let them cool in the ice bath for at least 10-15 minutes, or until they are completely cold to the touch.
Preparing the Filling
Now that our eggs are perfectly cooked and cooled, it’s time to get to the fun part: creating that irresistible creamy filling.
4. Once the eggs are thoroughly chilled and easy to handle, carefully peel them. The cold shock from the ice bath should have loosened the shells, making this process much smoother. If you find a particularly stubborn egg, you can gently tap it all over on a hard surface and then roll it between your palms to loosen the shell further before peeling under cool running water. Once peeled, slice each egg in half lengthwise using a sharp knife. Scoop out the yolks into a medium-sized bowl. You can use a fork or a potato masher to break up the yolks into fine crum extractbs.
Assembling the Deviled Eggs
This is where the magic happens, combining the creamy yolks with the other flavorful ingredients to create the signature deviled egg filling.
5. To the bowl of mashed egg yolks, add the Miracle Whip, apple cider vinegar, yellow mustard, granulated sugar, and kosher salt. If you’re using black pepper, add that now too. Mix all these ingredients together thoroughly until you have a smooth and creamy paste. Don’t be afraid to really mash and combine everything until there are no large lumps of yolk remaining. The key to a great deviled egg filling is a uniformly smooth consistency. Once your yolk mixture is smooth and well-combined, gently fold in the sweet relish. The relish adds a delightful texture and a touch of sweetness that perfectly complements the tangin extractess of the other ingredients. Taste the filling and adjust seasonings if necessary. If you prefer it tangier, add a tiny bit more vinegar. If it needs a touch more sweetness, a whisper more sugar can be added.
Filling and Garnishing
The final steps involve spooning or piping the filling back into the egg white halves and adding the finishing touches.
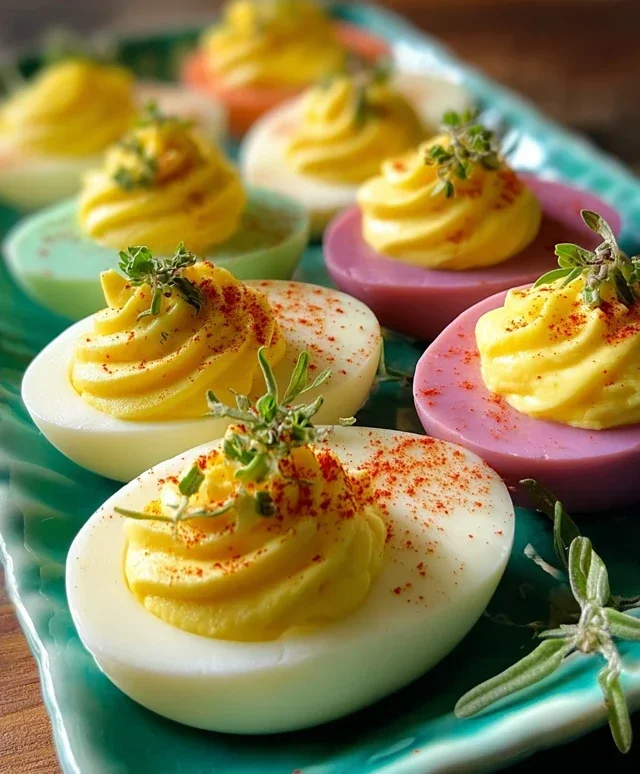
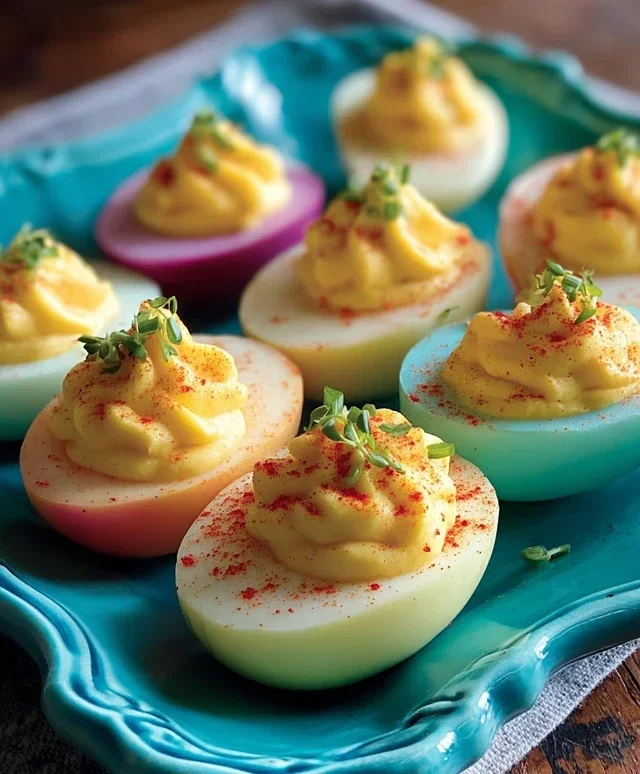
6. Carefully spoon or pipe the deviled egg filling back into the hollowed-out egg white halves. If you’re aiming for a more elegant presentation, you can use a piping bag fitted with a star tip to create decorative swirls of filling. This makes the deviled eggs look as good as they taste! For a classic and visually appealing garnish, sprinkle a little paprika over each filled egg half. The vibrant red of the paprika adds a beautiful contrast to the creamy filling and a hint of smoky flavor. If you have fresh chives, finely chop them and scatter them over the top for a burst of fresh, oniony flavor and a touch of green. These garnishes are optional but highly recommended for that extra flair. Arrange the finished deviled eggs on a platter and serve them chilled. They are best enjoyed within a day or two of making them, so they stay fresh and delicious. Enjoy this timeless appetizer that’s sure to be the star of your next meal!
Conclusion:
There you have it – the ultimate guide to crafting perfect deviled eggs! This recipe is truly a crowd-pleaser because it strikes that ideal balance between creamy, tangy, and satisfyingly savory. They’re incredibly versatile, making them a fantastic appetizer for any gathering, a welcome addition to brunches, or even a delightful snack. Don’t be afraid to get creative with the garnishes; a sprinkle of paprika is classic, but chives, beef bacon bits, or even a tiny piece of pickled jalapeño can elevate them to new heights.
The beauty of deviled eggs lies in their simplicity and adaptability. Feel free to experiment with different mayonnaise brands, add a touch of mustard for extra zing, or even incorporate a dash of hot sauce for a spicy kick. I encourage you to give this recipe a try; it’s remarkably easy to master and the results are always impressive. Your guests will be asking for your secret!
Frequently Asked Questions:
Can I make deviled eggs ahead of time?
Yes, absolutely! You can boil and peel the eggs up to two days in advance and store them in an airtight container in the refrigerator. Prepare the filling separately and store it in its own container. Then, simply assemble the deviled eggs a few hours before serving to allow the flavors to meld.
What are some other popular deviled egg variations?
Beyond the classic, some popular variations include adding avocado for extra creaminess, incorporating finely chopped pickles or relish for a briny crunch, or even adding a spoonful of curry powder for an Indian-inspired twist. Smoked paprika offers a wonderful depth of flavor too!
How do I prevent my deviled egg filling from being too runny or too stiff?
The key is to start with a good ratio of egg yolks to mayonnaise and mustard. If the mixture is too stiff, add mayonnaise a teaspoon at a time until you reach your desired consistency. If it’s too runny, a little more egg yolk or a touch of cream cheese can help thicken it up. Taste and adjust as you go!
Deviled Eggs
A classic appetizer for any gathering, these deviled eggs are creamy, tangy, and perfectly seasoned. Easy to make and always a crowd-pleaser.
Ingredients
-
6 Large eggs
-
1/4 tsp kosher salt
-
2 1/2 tbsp Miracle Whip
-
1 tsp Apple cider vinegar
-
1 tsp Yellow mustard
-
1/4 tsp Granulated sugar
-
2 tbsp Sweet Relish
-
A dash of black pepper
Instructions
-
Step 1
Place eggs in a saucepan and cover with cold water by about an inch. Bring to a boil over high heat. -
Step 2
Once boiling, remove from heat, cover, and let stand for 10-12 minutes. Drain and rinse with cold water. -
Step 3
Peel the eggs and slice them in half lengthwise. Scoop out the yolks into a medium bowl. -
Step 4
Mash the yolks with a fork. Stir in Miracle Whip, apple cider vinegar, yellow mustard, kosher salt, granulated sugar, and sweet relish until smooth and creamy. -
Step 5
Season with black pepper, if desired. -
Step 6
Spoon or pipe the yolk mixture back into the egg white halves. -
Step 7
Garnish with paprika and chives, if desired.
Important Information
Nutrition Facts (Per Serving)
It is important to consider this information as approximate and not to use it as definitive health advice.
Allergy Information
Please check ingredients for potential allergens and consult a health professional if in doubt.