Chocolate Peanut Butter Rice Krispie Squares Recipe
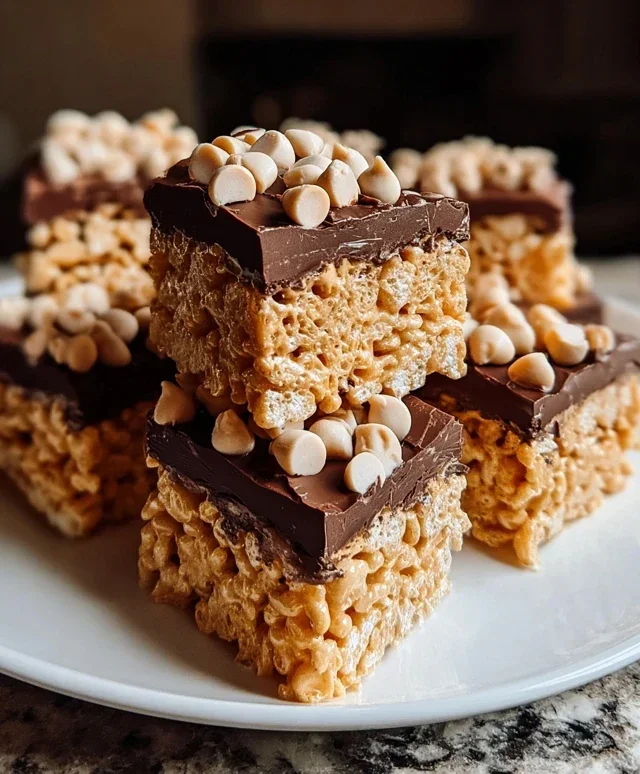
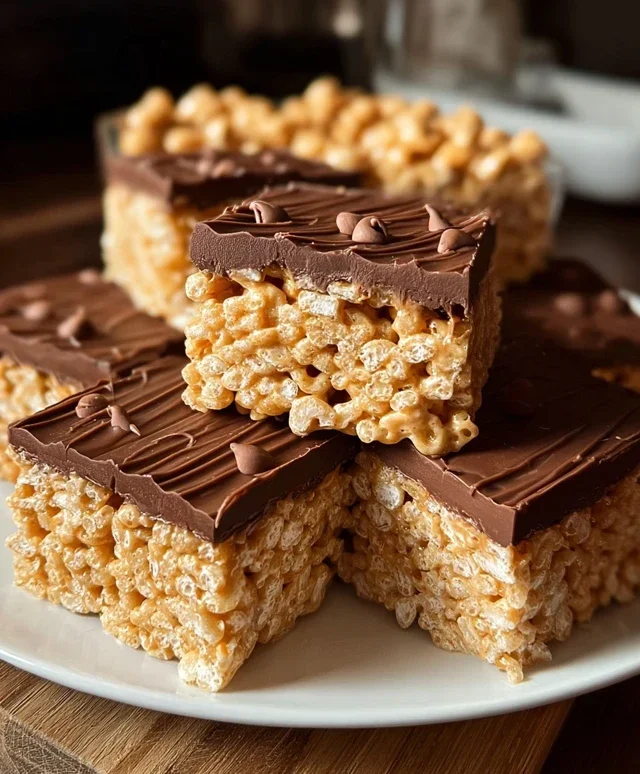
Chocolate Peanut Butter Rice Krispie Squares
are more than just a treat; they’re a gateway to pure, unadulterated joy. If you’ve ever experienced the magical crunch of a Rice Krispie square elevated by the decadent embrace of chocolate and the salty, nutty hug of peanut butter, you know exactly what I’m talking about. These aren’t your average, plain-jane squares. Oh no. We’re talking about a symphony of textures and flavors where the familiar crispy goodness meets a rich, gooey chocolate and peanut butter swirl that’s utterly irresistible.
It’s the perfect marriage of childhood nostalgia and grown-up indulgence, making Chocolate Peanut Butter Rice Krispie Squares a guaranteed crowd-pleaser for any occasion. What makes them truly special is their simplicity, allowing the star ingredients to shine without overshadowing each other. Get ready to ditch the boring and dive headfirst into a batch of these incredibly satisfying squares.
The Ultimate Chocolate Peanut Butter Rice Krispie Squares
Get ready to experience a nostalgic treat with a decadent twist! These Chocolate Peanut Butter Rice Krispie Squares are a game-changer. Forget the plain old origin extractal; we’re taking this classic comfort food to a whole new level of deliciousness. The combination of sweet, gooey marshmallows, crunchy Rice Krispies, creamy peanut butter, and melted milk chocolate is simply irresistible. They’re incredibly easy to make, making them perfect for a quick dessert, a party treat, or just when that craving hits. I’ve been making these for years, and they’re always a crowd-pleaser. They strike the perfect balance between chewy, crispy, and utterly satisfying.
Ingredients:
Getting Started: Preparation is Key
Before we dive into the melty goodness, it’s always a good idea to get your workspace ready. This ensures a smooth and efficient cooking process. First, I like to grease a 9×13 inch baking pan. You can use butter, non-stick cooking spray, or even line it with parchment paper, leaving some overhang on the sides to help lift the finished squares out easily. This step is crucial to prevent our delicious treats from sticking. Next, measure out all your ingredients and have them within easy reach. For the Rice Krispies, pour them into a very large mixing bowl. This might seem like a lot of cereal, but trust me, it’s the perfect amount for that satisfying crunch in every bite. Having everything prepped means you can move quickly once the marshmallows start melting, which is key to achieving the right texture.
The Melty Magic: Creating the Base
Now for the fun part! In a large saucepan or Dutch oven over low heat, melt the unsalted butter. You want to melt it gently, without letting it brown. Once the butter is completely liquid, add the marshmallows. This is where the magic really begin extracts. Stir the marshmallows constantly with a spatula or wooden spoon as they melt. Keep the heat on low. If the heat is too high, the marshmallows can scorch, which will affect the flavor and texture of your squares. It will seem like they’re taking forever at first, but be patient! They’ll start to soften and then rapidly begin extract to melt into a gooey, sticky mass. Keep stirring until the mixture is completely smooth and no lumps of marshmallow remain. This smooth, creamy base is what will bind all our delicious ingredients together.
Incorporating the Stars: Peanut Butter and Chocolate
Once the marshmallows are fully melted and smooth, remove the saucepan from the heat. This is the critical moment to add the peanut butter. Stir it into the melted marshmallow mixture until it’s fully incorporated and you have a uniform, creamy peanut butter-marshmallow goo. The heat from the marshmallow mixture will help the peanut butter melt and blend seamlessly. Now, it’s time for the chocolate! Add the milk chocolate chips directly into the hot mixture. Stir them in continuously. As you stir, the residual heat will start to melt the chocolate chips. Keep stirring until the chocolate is completely melted and you have a luscious, chocolate-swirled peanut butter base. The goal here is to have pockets of melted chocolate throughout the mixture, adding that extra layer of chocolatey bliss. If you prefer a more uniformly chocolatey flavor, you can stir more vigorously to ensure all the chips are fully melted into the marshmallow mixture.
Bringin extractg It All Together: The Crispy Crunch
With your decadent chocolate peanut butter mixture ready, it’s time to add the star of the Rice Krispie show: the cereal. Gently fold the 6 cups of Rice Krispie cereal into the hot marshmallow, peanut butter, and chocolate mixture. Use your spatula to carefully coat each crispy flake with the gooey goodness. It’s important to do this quickly but gently. You want to ensure the cereal is well-distributed without crushing the Rice Krispies, as that will diminish the signature crunch. Work efficiently, as the mixture will start to set as it cools. If it becomes too difficult to stir, you can briefly return the pan to very low heat for a few seconds, stirring constantly, just to loosen it up again. Don’t overheat, though, as this can make the squares hard.
Pressing Perfection: Shaping Your Squares
Once the cereal is evenly incorporated, it’s time to transfer the mixture to your prepared baking pan. Use your greased spatula, or a piece of parchment paper lightly greased on the bottom, to press the mixture evenly into the pan. Don’t press too hard, or you’ll compact the squares and make them dense. A gentle, even pressure is all you need to create a flat, uniform surface. If you’re using the optional chopped peanuts for garnish, sprinkle them over the top of the mixture now and gently press them in so they adhere. This adds a wonderful textural contrast and an extra burst of nutty flavor.
Cooling and Cutting: The Final Frontier
Let the squares cool completely at room temperature for at least 1-2 hours. This is a crucial step. Resist the urge to cut them too soon, as they will be very soft and messy. Patience will be rewarded with clean, beautiful squares. Once fully cooled, use the parchment paper overhang (if you used it) to lift the entire slab out of the pan onto a cutting board. Use a sharp knife, which you can lightly grease or dip in hot water and wipe dry for cleaner cuts, to slice the squares into your desired size. These are rich, so smaller squares are often perfect. Enjoy these incredibly delicious Chocolate Peanut Butter Rice Krispie Squares! They are best enjoyed within a day or two, stored in an airtight container at room temperature.
Conclusion:
And there you have it – your guide to creating the ultimate Chocolate Peanut Butter Rice Krispie Squares! This recipe is a winner because it masterfully combines the nostalgic crunch of Rice Krispies treats with the irresistible duo of chocolate and peanut butter. It’s incredibly easy to make, requiring minimal ingredients and no baking, making it perfect for both begin extractner bakers and seasoned pros looking for a quick, crowd-pleasing dessert. The rich chocolatey sweetness perfectly complements the salty, creamy peanut butter, creating a flavor explosion that’s truly addictive.
These delightful squares are wonderfully versatile. Serve them chilled as a delightful after-dinner treat, pack them into lunchboxes for a special surprise, or even crum extractble them over ice cream for an extra layer of texture and flavor. Don’t be afraid to get creative with variations! Consider adding a sprinkle of sea salt on top for an enhanced sweet and salty contrast, or stir in some mini chocolate chips or chopped peanuts into the mixture for added texture. You could even drizzle extra melted chocolate or peanut butter over the cooled squares for an even more decadent finish.
I truly encourage you to give this Chocolate Peanut Butter Rice Krispie Squares recipe a try. It’s a guaranteed hit that will bring smiles to everyone’s faces. The simple steps and delicious outcome make it a recipe you’ll want to make again and again.
Frequently Asked Questions:
Can I use a different type of cereal?
While Rice Krispies cereal is ideal for achieving the classic texture, you could experiment with other crispy rice cereals. However, results may vary slightly in terms of crispness and sweetness.
How should I store these squares?
To keep your Chocolate Peanut Butter Rice Krispie Squares fresh, store them in an airtight container at room temperature for up to 3 days. For longer storage, you can refrigerate them, though they might become a bit firmer.
Can I make these dairy-free?
Yes, you can! Ensure you use dairy-free butter or margarine and dairy-free chocolate chips. Many peanut butter varieties are naturally dairy-free, but it’s always good to check the label.
Chocolate Peanut Butter Rice Krispie Squares
A delicious and easy no-bake treat combining the classic flavors of chocolate and peanut butter with the crunchy texture of Rice Krispies.
Ingredients
-
6 cups Rice Krispie cereal
-
½ cup peanut butter (smooth or crunchy)
-
¼ cup unsalted butter
-
40 regular size marshmallows
-
1 cup milk chocolate chips
-
Optional: chopped peanuts for garnish
Instructions
-
Step 1
Grease a 9×13 inch baking pan with butter or cooking spray. -
Step 2
In a large saucepan, melt the butter over low heat. -
Step 3
Add the marshmallows and stir constantly until completely melted. -
Step 4
Remove the saucepan from heat and stir in the peanut butter until smooth. -
Step 5
Add the Rice Krispie cereal and stir until well coated. -
Step 6
Gently fold in the milk chocolate chips until just combined. -
Step 7
Press the mixture evenly into the prepared pan. Sprinkle with chopped peanuts if desired. -
Step 8
Let cool completely before cutting into squares.
Important Information
Nutrition Facts (Per Serving)
It is important to consider this information as approximate and not to use it as definitive health advice.
Allergy Information
Please check ingredients for potential allergens and consult a health professional if in doubt.