Easy Chocolate M&M Cookies- The Perfect Treat
Chocolate M&M Cookies are an absolute classic for a reason, and today I’m going to share my foolproof recipe for creating batches of pure joy. Who can resist the allure of soft, chewy centers bursting with melty chocolate chips and those iconic, colorful M&M candies? It’s no wonder these cookies have held a special place in our hearts and baking repertoires for generations. They evoke childhood memories, celebrate holidays, and are the ultimate crowd-pleaser at any gathering. What truly makes these Chocolate M&M Cookies so special is the perfect balance of sweet, rich chocolate and the delightful crunch and burst of flavor from the M&Ms. Plus, they’re incredibly versatile – imagin extracte them as a surprise treat in lunchboxes or the star of your next bake snon-alcoholic ale. Get ready to fill your kitchen with an irresistible aroma and create cookies that will disappear faster than you can say “one more!””
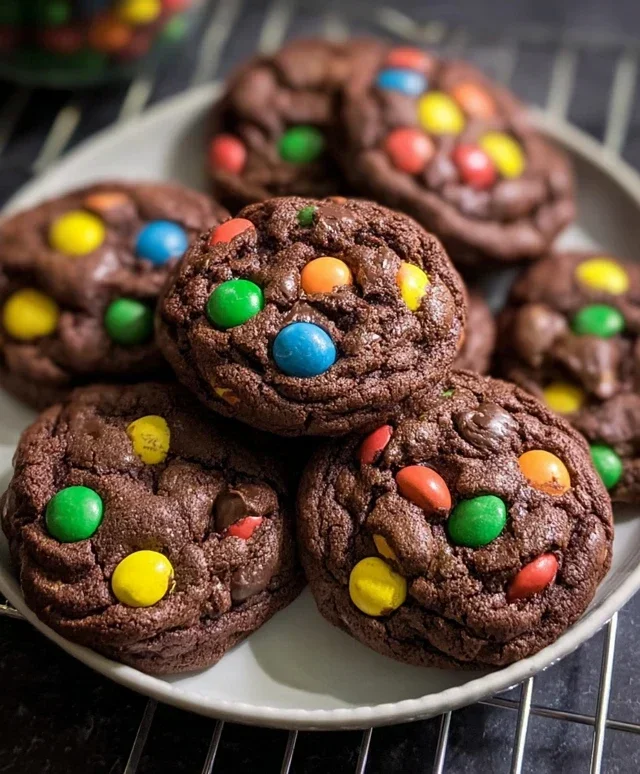
Chocolate M&M Cookies
There’s something undeniably joyful about a classic chocolate chip cookie, but what happens when you elevate it with the vibrant crunch and delightful melt of M&Ms? You get a cookie that’s not just delicious, but a miniature celebration in every bite! These Chocolate M&M Cookies are my go-to when I need a pick-me-up, a crowd-pleaser, or just a good old-fashioned treat. They’re rich, chewy, and packed with that satisfying chocolatey goodness, punctuated by the pops of color and flavor from the M&Ms. Trust me, once you try this recipe, it’ll become a staple in your baking repertoire. Let’s get started on these incredibly easy and utterly irresistible cookies!
Ingredients:
Mixing the Dough
The foundation of any great cookie lies in its dough, and for these Chocolate M&M Cookies, we’re building a rich, chocolatey base that’s just waiting to be studded with those iconic candies. First things first, ensure your unsalted butter is truly softened. This means it should be pliable and easily indentable with your finger, but not melted or oily. Softened butter is key for creaming with the sugars, which incorporates air and creates a tender cookie texture.
In a large mixing bowl, I like to start by creaming together the softened butter with the granulated white sugar and the brown sugar. If you’re using muscovado sugar, it will lend an even deeper, caramel-like richness to the cookies, which is a wonderful bonus! Creaming means beating these ingredients together until the mixture is light in color and fluffy in texture. This process can take a few minutes, either with an electric mixer (stand or hand) or a good deal of elbow grease and a sturdy whisk or wooden spoon. Don’t rush this step; it’s crucial for developing the cookie’s structure and chegrape juicess. Once beautifully creamed, it’s time to introduce the unsweetened cocoa powder. This is where the deep chocolate flavor truly begin extracts to shine. Make sure to use a good quality cocoa powder for the best results – it makes a noticeable difference. Whisk this in until it’s thoroughly combined with the butter and sugar mixture.
Next, we’ll add the vanilla extract or paste. Vanilla is a flavor enhancer, and in chocolate baked goods, it really rounds out and deepens the chocolate notes. After the vanilla, it’s time for the eggs. Crack your two large eggs into the mixture, one at a time, beating well after each addition. This ensures the eggs are fully incorporated and emulsified into the dough, contributing to the cookie’s richness and binding. Continue to mix until the batter is smooth and homogenous. The color at this stage should be a deep, inviting chocolate brown.
Now, for the dry ingredients. In a separate medium bowl, whisk together the all-purpose flour, baking soda, and salt. If you’re opting for a gluten-free blend, be sure to use one that’s designed for baking and has a good balance of flours and starches. The baking soda is essential for leavening, helping the cookies to spread and achieve that perfect chewy texture. The salt, even in a small amount, plays a vital role in balancing the sweetness and enhancing all the other flavors. Once whisked together, gradually add this dry mixture to the wet ingredients. It’s best to do this in two or three additions, mixing on low speed (if using an electric mixer) or stirring gently until just combined after each addition. Overmixing at this stage can lead to tough cookies, so stop as soon as you no longer see streaks of flour.
The final, most exciting addition is, of course, the M&Ms! Gently fold in the ¾ cup of M&Ms. I like to reserve a few to press into the tops of the cookies before baking for an extra visual appeal and immediate M&M goodness. Ensure they are evenly distributed throughout the dough. Avoid overmixing here as well; we want to distribute them, not break them up into little chocolate dust.
Baking the Cookies
Once your beautiful, M&M-studded dough is ready, it’s time to prepare for baking. Preheat your oven to 350 degrees Fahrenheit (175 degrees Celsius). While the oven heats up, line two baking sheets with parchment paper or silicone baking mats. This prevents sticking and makes for easy cleanup.
Using a cookie scoop or two spoons, drop rounded tablespoons of dough onto the prepared baking sheets, leaving about 2 inches of space between each cookie. This allows them room to spread. If you reserved some M&Ms, now is the time to gently press a few onto the top of each cookie. This is not only for aesthetics but also ensures that the M&Ms on the surface are perfectly visible and delightful.
Now, let’s talk about baking time. For perfectly chewy chocolate M&M cookies, aim for approximately 9 to 11 minutes. You’ll know they’re ready when the edges are set and look slightly dry, but the centers still appear soft and slightly underbaked. This is the secret to that irresistible chewy texture. If you bake them until the centers are firm, they’ll likely turn out more cake-like and less chewy. Immediately after removing the cookies from the oven, let them cool on the baking sheet for about 5 minutes. During this time, they will continue to set up and firm up slightly. After the 5-minute rest, carefully transfer the cookies to a wire rack to cool completely. This allows air to circulate around them, preventing the bottoms from becoming soggy. The aroma filling your kitchen at this point will be absolutely heavenly! Enjoy these delightful Chocolate M&M Cookies with a glass of milk or your favorite beverage.

Conclusion:
I hope you’re as excited about these Chocolate M&M Cookies as I am! These delightful treats are a guaranteed crowd-pleaser, offering that perfect balance of chewy cookie dough, melty chocolate chips, and the satisfying crunch of M&M’s. They’re surprisingly easy to make, making them an ideal baking project for begin extractners and experienced bakers alike. The aroma filling your kitchen as they bake is simply irresistible, and the taste? Pure bliss!
For serving, these cookies are fantastic on their own, but they truly shine when paired with a cold glass of milk – a classic combination for a reason! They also make a wonderful addition to any dessert spread, cookie exchange, or as a special homemade gift. Feeling adventurous? Consider adding a pinch of sea salt on top before baking for a delightful sweet and salty contrast, or experiment with different M&M flavors for a unique twist on this classic Chocolate M&M Cookies recipe.
So go ahead, preheat your ovens, gather your ingredients, and bake up a batch of these fantastic cookies. I promise you won’t regret it!
Frequently Asked Questions:
Can I make these cookies ahead of time?
Absolutely! You can prepare the cookie dough, roll it into balls, and store them on a baking sheet in the refrigerator for up to 2 days, or freeze them for up to 2 months. Just bake them directly from frozen, adding a few extra minutes to the baking time.
My cookies spread too much. What went wrong?
Several factors can cause excessive spreading. Ensure your butter wasn’t too soft or melted. Also, chilling the dough for at least 30 minutes before baking can significantly help prevent spreading and result in a chewier cookie.
What kind of M&M’s work best?
Classic milk chocolate M&M’s are the standard and yield wonderful results. However, feel free to use peanut butter M&M’s, pretzel M&M’s, or even seasonal varieties for a fun twist!
Chocolate M&M Cookies
Deliciously chewy chocolate cookies loaded with M&Ms.
Ingredients
-
8 tablespoons unsalted butter, softened to room temperature
-
¼ cup white granulated sugar
-
½ cup cocoa powder (regular good quality, unsweetened)
-
½ cup brown sugar (or muscovado sugar)
-
1 teaspoon vanilla extract
-
2 large eggs
-
1 and ½ cups all-purpose flour
-
1 teaspoon baking soda
-
¼ teaspoon salt
-
¾ cup M&Ms (no peanuts)
Instructions
-
Step 1
Preheat oven to 350°F (175°C). Line baking sheets with parchment paper. -
Step 2
In a large bowl, cream together the softened butter and granulated sugar until light and fluffy. -
Step 3
Beat in the cocoa powder, brown sugar, vanilla extract, and eggs one at a time until well combined. -
Step 4
In a separate bowl, whisk together the all-purpose flour, baking soda, and salt. -
Step 5
Gradually add the dry ingredients to the wet ingredients, mixing until just combined. Do not overmix. -
Step 6
Stir in the M&Ms until evenly distributed throughout the dough. -
Step 7
Drop rounded tablespoons of dough onto the prepared baking sheets, spacing them about 2 inches apart. -
Step 8
Bake for 9-11 minutes, or until the edges are set and the centers are still slightly soft. -
Step 9
Let the cookies cool on the baking sheets for a few minutes before transferring them to a wire rack to cool completely.
Important Information
Nutrition Facts (Per Serving)
It is important to consider this information as approximate and not to use it as definitive health advice.
Allergy Information
Please check ingredients for potential allergens and consult a health professional if in doubt.