Easy Japanese Tuna Onigiri Recipe Quick Snack
15-min. Easy Japanese Tuna Onigiri are a revelation for busy weeknights or spontaneous snack cravings! Have you ever found yourself staring into the fridge, wishing for something delicious, satisfying, and incredibly quick? That’s precisely where these delightful rice balls come in. They’re a staple for a reason – packed with savory tuna and fluffy rice, they offer a perfect balance of textures and flavors that are universally loved. What makes Japanese tuna onigiri so special is their incredible versatility and the sheer simplicity that belies their satisfying taste. They’re portable, perfect for lunchboxes, and can be customized endlessly. Imagin extracte crafting these little gems in under 15 minutes, bringin extractg a taste of authentic Japan right to your kitchen. It’s a recipe that’s as accessible as it is rewarding.
Get ready to master this quick and delicious dish!
15-Min. Easy Japanese Tuna Onigiri
Tired of the same old quick lunches or snacks? Craving something delicious, satisfying, and quintessentially Japanese? Then look no further than these incredibly easy 15-minute Japanese Tuna Onigiri! Onigiri, also known as rice balls, are a staple in Japanese bento boxes and a beloved snack. They are wonderfully versatile, but for a quick and flavorful option, tuna and mayonnaise is a classic combination that never disappoints. This recipe is designed for speed and simplicity, perfect for those busy days when you need a tasty bite without a lot of fuss.
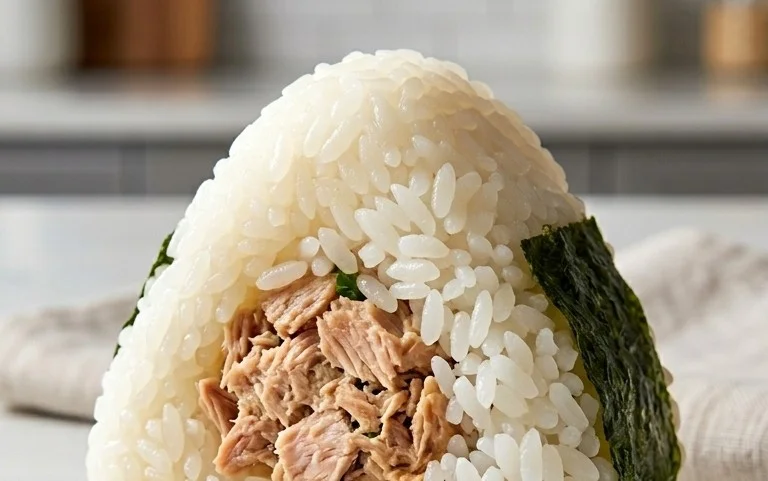
What makes onigiri so great? Firstly, they are incredibly forgiving. You don’t need fancy equipment or advanced culinary skills. The star of the show is, of course, the rice, and the filling is where you can have a little fun. Our chosen filling today is a simple yet delicious mix of canned tuna and Japanese mayonnaise. Japanese mayo, with its richer, creamier texture and slightly tangier flavor, is ideal here, but regular mayonnaise will work in a pinch. The salt and sesame seeds add just the right finishing touches to elevate these humble rice balls into something truly special.
The beauty of onigiri is their portability. They make a fantastic packed lunch for work or school, a convenient snack for an outing, or even a light dinner when you’re on the go. The nori wrapper adds a delightful oceanic crunch and a boost of nutrients. Don’t be intimidated by the idea of shaping rice; it’s surprisingly easy and can even be a fun activity to do with family or friends. Let’s get started on making these delightful little rice parcels!
Ingredients:
Instructions:
Preparing the Tuna Filling
Shaping the Onigiri
Finishing Touches
*Notes on Rice: If you are cooking fresh short-grain rice for this recipe, aim for about 2 cups of cooked rice. Typically, this would require about 1 cup of uncooked short-grain rice. Cook it according to your rice cooker’s instructions or on the stovetop. It’s best to use rice that has cooled slightly so it’s easier to handle but still warm enough to be moldable. If using leftover rice, ensure it’s not too hard or dry. You can briefly microwave it with a tablespoon of water to soften it up.
Conclusion:
There you have it – a foolproof guide to creating delicious and incredibly simple Japanese Tuna Onigiri in just 15 minutes! This recipe is an absolute winner for anyone seeking a quick, satisfying, and wholesome meal or snack. The beauty of this dish lies in its minimal ingredients and straightforward preparation, making it perfect for busy weeknights, a quick lunchbox addition, or even an impromptu gathering. The savory tuna filling, combined with perfectly seasoned sushi rice, creates a delightful flavor and texture that’s incredibly moreish. I truly encourage you to give this Japanese Tuna Onigiri a try – you won’t be disappointed by how easy and rewarding it is!
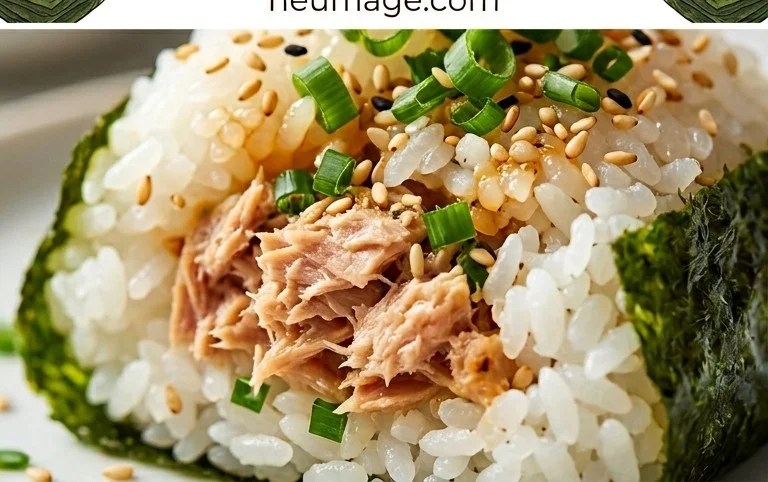
These little rice balls are wonderfully versatile. Serve them warm as a light lunch alongside some miso soup and a simple salad. They’re also fantastic chilled as a portable snack for picnics or on-the-go. For a fun twist, try experimenting with different fillings! Consider adding a sprinkle of furikake (Japanese rice seasoning), a dash of Kewpie mayonnaise for extra creaminess, or even some finely chopped pickled gin extractger for a zesty kick. Don’t be afraid to get creative and make them your own!
Frequently Asked Questions:
Q: Can I use regular canned tuna instead of Japanese tuna?
Absolutely! While Japanese canned tuna often has a richer flavor and firmer texture, regular canned tuna (packed in water or oil, drained well) works perfectly fine. Just ensure you drain it thoroughly to avoid soggy onigiri.
Q: How should I store leftover onigiri?
For the best quality, it’s recommended to enjoy onigiri fresh. However, if you have leftovers, let them cool completely and store them in an airtight container in the refrigerator for up to 2 days. They can be enjoyed cold, or gently reheated in a microwave for about 20-30 seconds.
15-min. Easy Japanese Tuna Onigiri
Quick and simple Japanese rice balls filled with seasoned tuna and mayonnaise.
Ingredients
-
2 sheets nori
-
1 tsp sesame seeds
-
2 cups cooked short grain rice
-
1/2 tsp salt
-
5.29 oz canned tuna (in oil recommended, or canned tuna in water)
-
2 tbsp Japanese mayo
Instructions
-
Step 1
Drain the canned tuna thoroughly and place it in a small bowl. Mix with Japanese mayonnaise and salt until well combined. -
Step 2
In a separate bowl, lightly moisten your hands with water and sprinkle a pinch of salt on them. This prevents the rice from sticking. -
Step 3
Take about 1/2 cup of cooked rice and flatten it in your palm. Make an indentation in the center. -
Step 4
Spoon about 1-2 tablespoons of the tuna mixture into the indentation. Cover with a little more rice and gently shape into a triangle or ball. -
Step 5
Wrap a strip of nori around the onigiri. Garnish with sesame seeds if desired. -
Step 6
Repeat with the remaining rice and tuna mixture. Serve immediately.
Important Information
Nutrition Facts (Per Serving)
It is important to consider this information as approximate and not to use it as definitive health advice.
Allergy Information
Please check ingredients for potential allergens and consult a health professional if in doubt.