
Gluten-Free Buttery Tea Scones-Easy Recipe
Gluten-Free Buttery Tea Scones are a delightful treat that can transform your afternoon. There’s something undeniably comforting about a warm, crum extractbly scone, especially when it’s made with that rich, buttery flavor we all adore. For those of us navigating a gluten-free lifestyle, finding a scone that truly lives up to the classic version can feel like discovering a hidden treasure. That’s precisely what this recipe aims to achieve. We’re talking about scones that are tender, light, and bursting with that signature buttery goodness, all without a trace of gluten. Imagin extracte the simple pleasure of enjoying these with your favorite jam and a dollop of cream, proving that gluten-free baking can be every bit as satisfying and delicious. These Gluten-Free Buttery Tea Scones are poised to become your new go-to for a perfect cuppa.
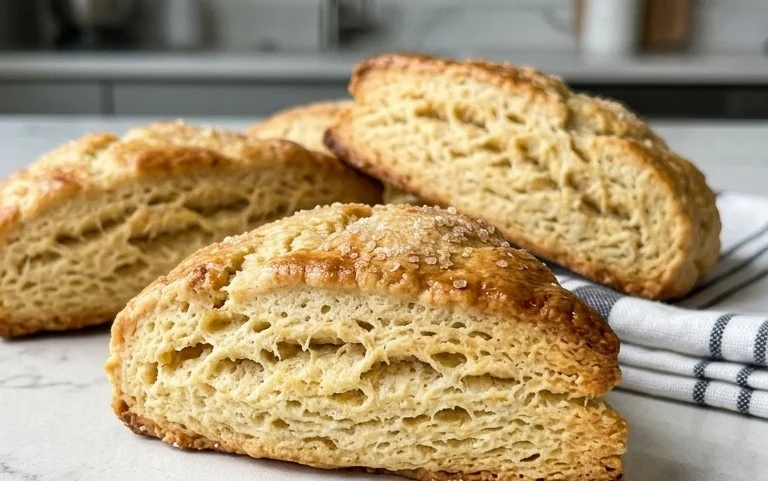
Gluten-Free Buttery Tea Scones
There’s something undeniably comforting about a warm, buttery scone, especially when served with a steaming cup of tea. For those of us who navigate the world of gluten-free baking, achieving that perfect flaky texture and rich flavor can sometimes feel like a culinary quest. But fear not, fellow gluten-free adventurers! I’ve been tinkering in the kitchen, and I’m thrilled to share my recipe for Gluten-Free Buttery Tea Scones that are surprisingly simple to make and absolutely delicious. These scones are incredibly versatile; you can enjoy them plain, studded with sweet berries, or even savory with a hint of cheese.
Ingredients:
Making Your Gluten-Free Scones
The key to tender, flaky scones, whether gluten-free or not, lies in keeping your ingredients cold and not overworking the dough. We’re aiming for a light hand and a quick process to create those delightful layers.
Step 1: Combine Your Dry Ingredients
In a large mixing bowl, whisk together the brown rice flour, tapioca starch, sugar, baking powder, xanthan gum, and salt. Ensure everything is thoroughly combined. This step is crucial for even distribution of the leavening agents and the xanthan gum, which acts as our gluten binder. Take a moment to really get into the corners of the bowl to make sure there are no pockets of unincorporated ingredients. The xanthan gum is particularly important in gluten-free baking; it provides structure and elasticity that gluten normally would.
Step 2: Cut in the Cold Butter
Now, add your cold, cubed butter to the dry ingredients. This is where we start building that signature scone texture. You can use a pastry blender, your fingertips, or even a food processor to cut the butter into the flour mixture. The goal is to achieve a coarse meal texture, with some pea-sized pieces of butter remaining. These butter pieces will melt in the oven, creating steam pockets that lead to flakiness. Don’t overwork this step; we don’t want the butter to become fully incorporated and greasy. If you’re using your fingers, work quickly to prevent the butter from melting too much. Imagin extracte you’re gently rubbing the butter into the flour until it resembles coarse breadcrum extractbs.
Step 3: Incorporate the Wet Ingredients and Add Your Mix-ins
In a separate small bowl, whisk together the milk and the beaten egg. Pour this wet mixture into the bowl with your dry ingredients and butter. Gently mix until just combined. Again, the key here is to avoid overmixing. A few streaks of flour are perfectly fine; the dough will come together as you bring it to a surface. If you’re adding blueberries, cranberries, cheddar, or chocolate chips, this is the time to gently fold them in. Be delicate so you don’t crush the fruit or melt the chocolate too much at this stage. For savory scones, the grated cheddar adds a wonderful salty bite that pairs beautifully with the buttery base. For sweet scones, the blueberries and cranberries offer bursts of fruity flavor, while chocolate chips provide that irresistible indulgence.
Step 4: Shape and Cut Your Scones
Turn the dough out onto a lightly floured surface (using more brown rice flour or tapioca starch). Gently pat the dough into a circle or rectangle about 3/4 to 1 inch thick. Do not knead the dough. If it feels too sticky, lightly dust your hands with flour. Use a sharp knife or a biscuit cutter to cut the dough into wedges or rounds. For wedges, cut the circle into 6 or 8 equal triangles. If you’re using a biscuit cutter, press straight down without twisting to ensure clean edges, which helps with even rising. Place the cut scones onto a baking sheet lined with parchment paper. You can gently reshape any scraps by patting them together and cutting again, but handle them as little as possible.
Step 5: Bake to Golden Perfection
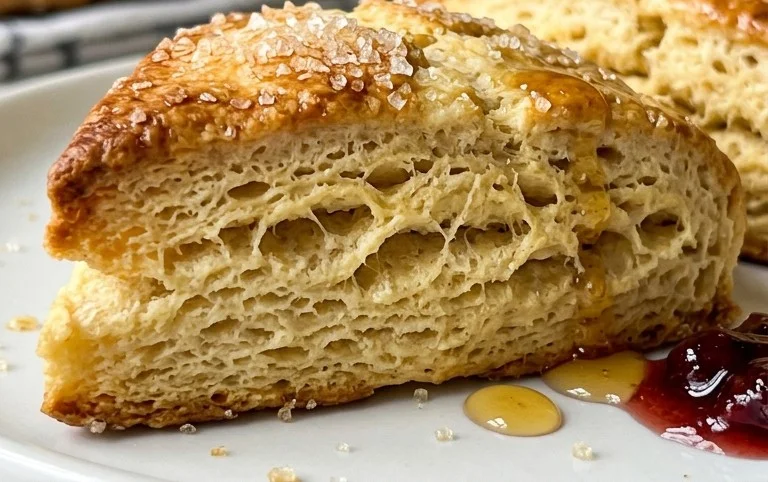
Preheat your oven to 400°F (200°C). Before baking, you can brush the tops of your scones with a little extra milk or egg wash for a lovely golden sheen. Bake for 15-20 minutes, or until the scones are golden brown and have risen nicely. The exact baking time will depend on your oven and the size of your scones. You’ll know they’re done when a toothpick inserted into the center comes out clean. Allow the scones to cool on a wire rack for a few minutes before serving. They are best enjoyed warm, perhaps with a dollop of butter, jam, or clotted cream. These Gluten-Free Buttery Tea Scones are a delightful treat that proves gluten-free baking can be every bit as satisfying and delicious as its traditional counterpart. Enjoy!
Conclusion:
I hope you’ve enjoyed learning how to make these wonderfully simple yet utterly delicious Gluten-Free Buttery Tea Scones. The beauty of this recipe lies in its straightforwardness, yielding perfectly tender, crum extractbly scones with that essential buttery richness, all without a trace of gluten. They’re incredibly versatile, making them a fantastic addition to any afternoon tea, breakfast spread, or even as a light dessert. Don’t be intimidated by gluten-free baking; this recipe proves it can be both easy and incredibly rewarding, resulting in a treat that everyone can enjoy.
I love serving these warm with a generous dollop of clotted cream and your favorite jam, but they are also delightful with a drizzle of honey or a smear of good quality butter. For a touch of sweetness, consider adding a handful of fresh berries or some finely chopped crystallized gin extractger to the dough before baking. The possibilities are endless, and the result is always a comforting, homemade delight. I truly encourage you to give this Gluten-Free Buttery Tea Scones recipe a try – you might just find it becomes a staple in your baking repertoire!
Frequently Asked Questions:
Can I freeze these scones?
Yes, absolutely! Once cooled completely, you can wrap individual scones tightly in plastic wrap and then place them in a freezer-safe bag or container. They will keep well in the freezer for up to 2-3 months. To reheat, simply thaw them at room temperature or warm them gently in a low oven for a few minutes.
What is the best gluten-free flour blend to use?
For the best results with this Gluten-Free Buttery Tea Scones recipe, I recommend using a good quality all-purpose gluten-free flour blend that contains xanthan gum. Brands like Bob’s Red Mill 1-to-1 Baking Flour or King Arthur Baking Gluten-Free Measure for Measure Flour usually work wonderfully and provide excellent texture.
Can I make these scones vegan?
While this recipe is specifically designed for buttery scones, you can certainly adapt it for a vegan version. You would need to replace the butter with a solid vegan butter alternative and the milk with a plant-based milk like almond or soy milk. You may also need to experiment slightly with the fat content to achieve the perfect crum extractb.
Gluten-Free Buttery Tea Scones
Delicious and tender gluten-free scones perfect for tea time, featuring a buttery texture and customizable with various mix-ins.
Ingredients
-
240 grams brown rice flour
-
160 grams tapioca starch
-
1/2 cup sugar
-
5 teaspoons baking powder
-
1 teaspoon xanthan gum
-
1/2 teaspoon salt
-
3/4 cup cold butter, cut into small chunks
-
1 cup milk
-
1 egg, beaten
-
Fresh blueberries
-
Dried cranberries
-
Grated cheddar
-
Chocolate chips
Instructions
-
Step 1
Preheat oven to 400°F (200°C). Line a baking sheet with parchment paper. -
Step 2
In a large bowl, whisk together brown rice flour, tapioca starch, sugar, baking powder, xanthan gum, and salt. -
Step 3
Cut in the cold butter using a pastry blender or your fingertips until the mixture resembles coarse crumbs. -
Step 4
In a separate bowl, whisk together the milk and beaten egg. Pour the wet ingredients into the dry ingredients and mix until just combined. Do not overmix. -
Step 5
Gently fold in your desired mix-ins (blueberries, cranberries, cheddar, or chocolate chips). The dough will be slightly sticky. -
Step 6
Turn the dough out onto a lightly floured surface and pat it into a circle about 3/4-inch thick. Cut into 8 wedges. -
Step 7
Place the scone wedges on the prepared baking sheet and bake for 15-18 minutes, or until golden brown and cooked through.
Important Information
Nutrition Facts (Per Serving)
It is important to consider this information as approximate and not to use it as definitive health advice.
Allergy Information
Please check ingredients for potential allergens and consult a health professional if in doubt.