Easy Vegan Mango Mousse – Delicious Tropical Treat
Vegan Mango Mousse is a dream come true for anyone craving a taste of tropical bliss, a dessert that’s as stunning to behold as it is delightful to devour. Forget complicated recipes and dairy woes; this luscious creation proves that plant-based desserts can be utterly decadent and incredibly easy to make. We all adore the vibrant sweetness and silky texture of traditional mousse, and this vegan mango mousse captures that essence perfectly, elevated by the sunshine-kissed flavor of ripe mangoes. What truly sets this vegan mango mousse apart is its incredible lightness. It’s a guilt-free indulgence, bursting with natural fruity goodness and a creamy, cloud-like consistency that melts in your mouth. Whether you’re hosting a dinner party or simply treating yourself after a long day, this recipe offers a guaranteed smile and a spoonful of pure happiness.
Vegan Mango Mousse
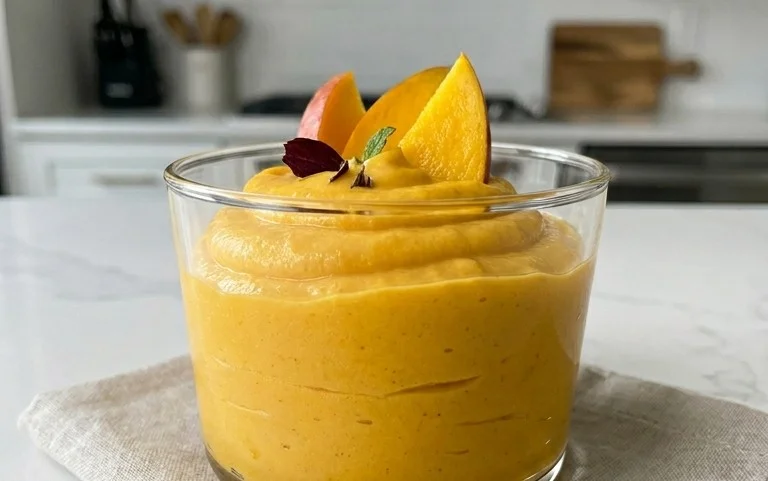
Prepare yourself for a taste of pure tropical bliss with this incredibly simple yet utterly decadent Vegan Mango Mousse. This dessert is a celebration of vibrant flavors and silky smooth textures, proving that you don’t need dairy or eggs to create something truly special. Imagin extracte the sweet, sun-kissed essence of ripe mangoes transformed into a light, airy mousse, perfect for a warm afternoon treat or a sophisticated end to a meal. This recipe is designed to be straightforward, relying on just a few high-quality ingredients to let the star, the mango, shine. Whether you’re a seasoned vegan baker or just curious about plant-based desserts, this mango mousse is sure to become a firm favorite. The beauty of this recipe lies in its simplicity, making it accessible for cooks of all levels. Plus, it’s incredibly versatile – serve it in individual glasses for an elegant presentation, or scoop it into a large bowl for a more rustic, family-style dessert.
Ingredients:
The Magic Behind the Mousse
This recipe is all about harnessing the natural sweetness and luscious texture of ripe mangoes. The key to achieving that cloud-like fluffiness comes from the rich, full-fat coconut cream. When chilled, the thick, solid part of coconut cream whips up beautifully, creating an airy base that holds the mango puree. Agave syrup, or powdered sugar, provides just the right amount of sweetness to enhance the mango flavor without overpowering it. The choice between agave and powdered sugar often comes down to personal preference and what you have on hand. Agave offers a more liquid sweetness and can lend a slightly more subtle flavor, while powdered sugar dissolves instantly and provides a very smooth texture. Both work wonderfully here, so choose what suits you best. The ripeness of your mangoes is paramount; look for fruits that yield slightly to gentle pressure and have a sweet, fruity aroma. Overripe mangoes will be even more flavorful and easier to blend into a smooth puree.
Crafting Your Tropical Dream
Now, let’s get down to creating this delightful vegan treat. The process is wonderfully intuitive and doesn’t require any complicated techniques.
Step 1: Preparing the Mangoes
Begin extract by peeling your three ripe mangoes. The easiest way to do this is to slice off the “cheeks” of the mango by cutting along either side of the flat seed. Then, score the flesh of each cheek in a grid pattern, being careful not to cut through the skin. Gently push the skin inwards, and the cubes of mango will pop out, ready to be scooped off. Alternatively, you can use a spoon to scoop the flesh directly from the skin once the mangoes are cut into manageable pieces. Discard the seed and any remaining peel. Once you have the mango flesh, place it into a blender or food processor. You want the mango to be as smooth as possible, so blend it until there are no fibrous bits remaining. Aim for a silky puree; this will form the flavor base of your mousse.
Step 2: Chilling the Coconut Cream
This step is crucial for achieving the correct mousse texture. You’ll need to use the thick, solid cream from a can of full-fat coconut milk. For best results, place your can(s) of coconut milk in the refrigerator overnight or for at least 8 hours. This allows the cream to separate from the water and solidify at the top. When you open the can, carefully scoop out only the thick, solidified cream, leaving the liquid coconut water behind. You can save the coconut water for smoothies or other recipes. Measure out your 1 ½ cups of coconut cream. If your coconut cream isn’t fully solid or you’re short on time, you can place the scooped cream in a chilled bowl and whisk it vigorously for a minute or two to firm it up slightly, but overnight refrigeration is ideal.
Step 3: Combining and Sweetening
In a clean, chilled mixing bowl, add the 1 ½ cups of scooped coconut cream. If you used powdered sugar, add it now. If you’re using agave syrup, you can add it now or wait until you’ve whipped the cream. Using an electric mixer (a hand mixer or stand mixer works best for this), start whipping the coconut cream on medium speed. You want to whip it until it becomes light and fluffy, similar to how you would whip dairy cream. This can take anywhere from 2 to 5 minutes, depending on the richness of your coconut cream and the power of your mixer. Be careful not to overmix, as it can become greasy. Once the coconut cream is fluffy, gently fold in the mango puree you prepared earlier. If you’re using agave syrup and haven’t added it yet, now is the time to drizzle it in.
Step 4: Achieving the Mousse Consistency
Continue to gently fold the mango puree into the whipped coconut cream. The goal is to combine the two ingredients thoroughly while preserving the airiness you’ve created. You want a uniform color and consistency, where the mango is fully incorporated. Taste the mixture at this stage. This is your opportunity to adjust the sweetness. If you prefer it sweeter, add another tablespoon of agave syrup or a teaspoon of powdered sugar and gently fold it in until combined. Remember that the flavors will meld and slightly intensify as the mousse chills. The consistency should be thick but still spoonable. If it feels too thin, you can briefly pop the bowl back into the refrigerator for 15-20 minutes to help it set a bit more.
Step 5: Chilling and Serving
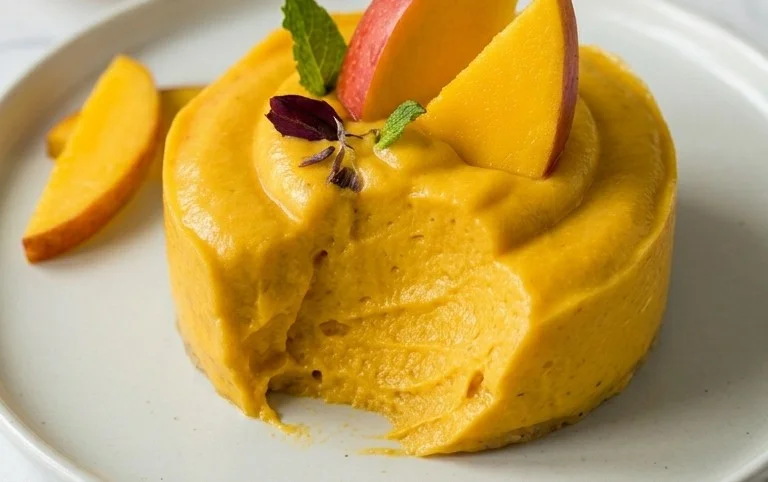
Once your mousse has reached your desired consistency and sweetness, it’s time to chill it to perfection. Spoon the vegan mango mousse into individual serving glasses, small bowls, or ramekins. You can also prepare it in a larger serving dish. For an elegant presentation, use a piping bag fitted with a star tip to pipe the mousse into your glasses. Cover each serving with plastic wrap or place the larger dish in an airtight container. Refrigerate the mousse for at least 2 to 3 hours, or preferably until it is fully set and chilled. This chilling time allows the flavors to meld beautifully and the mousse to firm up to that delightful, melt-in-your-mouth texture. Serve chilled, and feel free to garnish with a sprig of mint, a few toasted coconut flakes, or a small slice of fresh mango. Enjoy every spoonful of this delightful tropical dessert!
Conclusion:
And there you have it – your very own luscious, dairy-free Vegan Mango Mousse! I truly believe this recipe is a winner because it’s incredibly simple to whip up, using just a handful of wholesome ingredients, yet delivers a taste and texture that’s pure indulgence. The natural sweetness and vibrant flavor of ripe mangoes shine through, creating a dessert that feels both refreshing and satisfying. It’s the perfect light ending to any meal, or even a delightful afternoon treat.
For serving suggestions, I love topping my vegan mango mousse with a sprinkle of toasted coconut flakes, a few fresh mint leaves, or even some finely chopped pistachios for a delightful crunch. You can also swirl in a bit of passionfruit puree for an extra tropical kick. If you’re feeling adventurous with variations, try adding a touch of lime zest for brightness, or a pinch of cardamom for a more exotic aroma. Don’t be afraid to experiment! I wholeheartedly encourage you to give this recipe a try; I’m confident you’ll fall in love with how easy and delicious it is.
Frequently Asked Questions:
Can I use frozen mangoes for this vegan mango mousse?
Absolutely! Frozen mango chunks work beautifully and can even help achieve a thicker, frostier texture. Just ensure they are fully thawed before blending for the smoothest consistency.
What if my mangoes aren’t very sweet?
If your mangoes are a bit tart, you can easily adjust the sweetness by adding a touch of maple syrup or agave nectar to taste while blending. Start with a tablespoon and add more as needed until you reach your desired sweetness level.
Vegan Mango Mousse
A light and creamy vegan mango mousse, perfect for a refreshing dessert.
Ingredients
-
3 ripe mangoes
-
1 ½ cup coconut cream
-
3 tbsp agave syrup
-
1 tsp vanilla extract
-
Pinch of salt
Instructions
-
Step 1
Peel and chop the ripe mangoes. -
Step 2
Combine chopped mangoes, coconut cream, agave syrup, vanilla extract, and salt in a blender. -
Step 3
Blend until completely smooth and creamy. -
Step 4
Pour the mixture into individual serving glasses or a larger bowl. -
Step 5
Chill in the refrigerator for at least 2-3 hours, or until set. -
Step 6
Garnish with fresh mango cubes or mint leaves before serving, if desired.
Important Information
Nutrition Facts (Per Serving)
It is important to consider this information as approximate and not to use it as definitive health advice.
Allergy Information
Please check ingredients for potential allergens and consult a health professional if in doubt.