Easy Homemade Fruit Leather – Sweet & Healthy Snack
Homemade fruit leather recipes are an absolute game-changer when it comes to healthy and delicious snacks! Remember those brightly colored, chewy fruit snacks from childhood? Well, imagin extracte creating that same joy, but with pure, unadulterated fruit and none of the artificial stuff. That’s the magic of homemade fruit leather. It’s incredibly rewarding to transform fresh produce into these vibrant, portable treats that kids and adults alike can’t get enough of. What makes it so special? It’s the intense, natural fruit flavor that shines through, a testament to the power of simple, wholesome ingredients. Plus, the satisfaction of making your own healthy snacks from scratch is truly unparalleled. Get ready to embark on a delicious journey to mastering the art of homemade fruit leather!
Homemade Fruit Leather Recipe
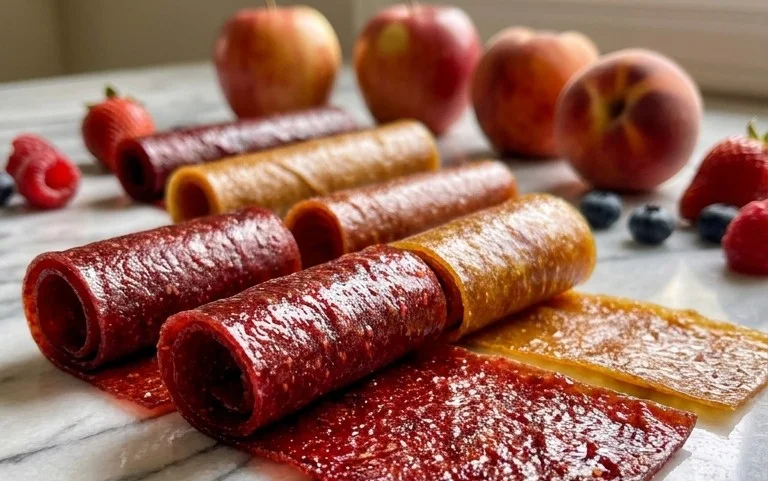
There’s something incredibly satisfying about making your own fruit leather. It’s a simple process, surprisingly rewarding, and the result is a chewy, intensely flavored treat that’s far healthier and more delicious than anything you’ll find pre-packaged. Forget those artificially colored, sugar-laden versions; with just a few basic ingredients and a little patience, you can create vibrant, naturally sweet fruit leather that tastes like pure sunshine. It’s perfect for lunchboxes, a healthy snack on the go, or even a fun dessert. Plus, it’s a fantastic way to use up seasonal fruit when it’s at its peak. Let’s get started on creating your own delicious fruit leather!
Ingredients:
Cooking Instructions:
Creating your own fruit leather is a journey of transforming simple ingredients into a delightful, chewy snack. The process involves a bit of cooking and a lot of patient drying. We’ll break it down into clear, manageable steps.
Step 1: Preparing the Fruit
The first and most crucial step is to prepare your fruit. Wash your chosen fruit thoroughly. If you’re using berries, a gentle rinse under cool water should suffice. For larger fruits like peaches or apples, you’ll want to peel them, remove any pits or cores, and then chop them into roughly ½-inch pieces. The size of the chop isn’t critically important, as everything will be blended down, but it helps ensure even cooking. The goal here is to have about 2 cups of chopped fruit. If you’re using frozen fruit, you can use it directly, and it will thaw during the cooking process. Don’t be afraid to mix and match fruits for unique flavor combinations! For example, strawberries and peaches make a wonderfully sweet and tangy pairing.
Step 2: Cooking and Softening the Fruit
Once your fruit is prepped, it’s time to start the cooking process. Transfer your chopped fruit into a medium saucepan. Add the white sugar. The amount of sugar can be adjusted based on the natural sweetness of your fruit and your personal preference. If your fruit is very ripe and sweet, you might get away with slightly less sugar. Conversely, if you’re using a tarter fruit like cranberries or certain apple varieties, you might consider a touch more. Pour in the juice from half a lemon. The lemon juice isn’t just for flavor; it also helps to brighten the fruit’s natural color and adds a bit of tartness that balances the sweetness, preventing the fruit leather from tasting cloying. Stir everything together to ensure the sugar and lemon juice are evenly distributed amongst the fruit.
Step 3: Simmering to Perfection
Place the saucepan over medium heat. Bring the mixture to a gentle simmer, stirring occasionally. You’ll notice the fruit begin extractning to break down and release its juices. Continue to simmer the fruit mixture for about 10-15 minutes, or until the fruit is very soft and easily mashed with a spoon. This cooking process not only softens the fruit but also concentrates its natural flavors. If the mixture seems too dry and starts to stick, you can add a tablespoon or two of water. However, most fruits will release plenty of their own liquid. The aim is for a mushy, stew-like consistency. This is the foundation of your delicious fruit leather.
Step 4: Blending into a Smooth Purée
Now that your fruit is beautifully softened and cooked, it’s time to create a smooth purée. Carefully transfer the cooked fruit mixture from the saucepan to a blender or a food processor. Allow the mixture to cool slightly before blending, especially if you’re using a standard blender, to avoid any steam-related accidents. Blend the mixture until it is completely smooth and creamy, with no visible chunks of fruit remaining. You’re looking for a consistency similar to applesauce. If your blender is struggling to achieve a smooth texture, you can add a tablespoon of water at a time, but be careful not to make it too thin, as this will affect the drying time. This smooth purée is what will form your fruit leather.
Step 5: Spreading and Drying (The Patient Part!)
This is where the magic truly happens, but it requires patience. Preheat your oven to its lowest possible setting, usually around 170-200 degrees Fahrenheit (75-95 degrees Celsius). Line a baking sheet with parchment paper or a silicone baking mat, ensuring it covers the entire surface. Pour the fruit purée onto the prepared baking sheet. Using a spatula, spread the purée evenly into a thin, uniform layer, about ¼ inch thick. Try to make the layer as consistent as possible to ensure even drying. The edges will naturally be thinner, so try to keep them from becoming too delicate. Place the baking sheet in the preheated oven.
The drying process can take anywhere from 4 to 8 hours, or even longer, depending on your oven and the humidity in your home. You want the fruit leather to be firm to the touch and no longer sticky. It should peel away cleanly from the parchment paper. If you notice any spots that are still wet or gummy, you can fold them over and continue drying. Once it feels leathery and slightly pliable, it’s ready. You can test this by gently touching a small section; if it doesn’t leave a residue on your finger, it’s done.
Step 6: Cooling and Cutting
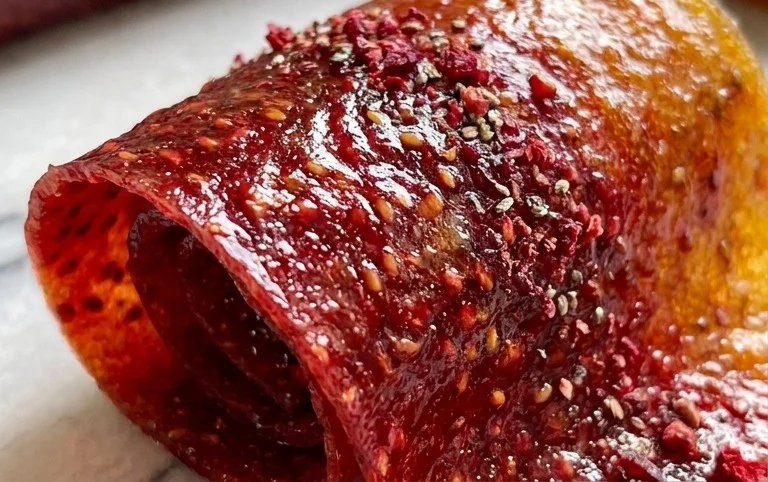
Once your fruit leather is perfectly dried, carefully remove the baking sheet from the oven. Let the fruit leather cool completely on the baking sheet. This cooling process allows it to firm up further. Once cool, you can peel the entire sheet of fruit leather off the parchment paper. Now comes the fun part of cutting it into manageable pieces. You can cut it into strips, squares, or even roll it up into little pinwheels. For easy storage and to prevent sticking, you can roll each piece tightly. Store your homemade fruit leather in an airtight container at room temperature for up to two weeks, or in the refrigerator for longer storage. Enjoy your healthy, homemade creation!
Conclusion:
Embarking on the journey of making your own homemade fruit leather is incredibly rewarding and surprisingly simple! This recipe offers a fantastic way to preserve the natural sweetness and vibrant flavors of your favorite fruits, creating a healthy and delicious treat that everyone will love. It’s a wonderful activity to do with kids, turning a kitchen project into a fun learning experience about healthy eating and food preservation. The versatility of this recipe means you can endlessly experiment with different fruit combinations, making it a staple in your snack repertoire. I truly encourage you to give this homemade fruit leather recipe a try – the satisfaction of biting into a chewy, tangy, homemade creation is unparalleled!
Serving suggestions abound! Enjoy your fruit leather as a wholesome snack on its own, pack it into lunchboxes for a sweet surprise, or even crum extractble it over yogurt or ice cream for a burst of fruity flavor and texture. Don’t be afraid to get creative with your fruit choices – berries, stone fruits, tropical fruits, or a blend of them all can yield delightful results.
Frequently Asked Questions:
How long does homemade fruit leather last?
When stored properly in an airtight container at room temperature, your homemade fruit leather can last for about 1-2 weeks. For longer storage, you can refrigerate it for up to a month or even freeze it for several months. Ensure it’s completely cool and dry before packagin extractg to prevent spoilage.
Can I make fruit leather without a dehydrator?
Absolutely! While a dehydrator is convenient, you can achieve perfect fruit leather using your oven. Simply spread the fruit puree thinly on parchment paper-lined baking sheets and bake at the lowest possible oven temperature (around 170-200°F or 75-95°C) for several hours, until it’s no longer sticky to the touch. You’ll need to keep an eye on it to prevent burning.
Homemade Fruit Leather
A simple and delicious recipe for homemade fruit leather, perfect for snacks.
Ingredients
-
2 cups fruit, chopped
-
3 tbsp white sugar
-
½ whole lemon, just the juice
-
1/4 cup water
-
1 tsp cornstarch
Instructions
-
Step 1
Combine chopped fruit and white sugar in a saucepan. -
Step 2
Add the juice of half a lemon and 1/4 cup water. Bring to a simmer. -
Step 3
Cook, stirring occasionally, until the fruit is very soft, about 10-15 minutes. -
Step 4
Puree the mixture until smooth using an immersion blender or a regular blender. -
Step 5
Stir in 1 tsp cornstarch to help thicken. Cook for another 2 minutes. -
Step 6
Pour the mixture onto a parchment-lined baking sheet, spreading it thinly and evenly. -
Step 7
Bake at the lowest oven temperature (around 170°F or 75°C) for 2-3 hours, or until the fruit leather is no longer sticky and peels easily from the parchment paper. -
Step 8
Let it cool completely before cutting into strips.
Important Information
Nutrition Facts (Per Serving)
It is important to consider this information as approximate and not to use it as definitive health advice.
Allergy Information
Please check ingredients for potential allergens and consult a health professional if in doubt.