Nut Free Pesto Recipe – Delicious & Easy Allergy-Friendly
Nut Free Pesto might just be the culinary game-changer you’ve been waiting for! If you’re like me, you adore the vibrant, herbaceous punch of traditional pesto, but allergies or simply a desire for something different can make it a no-go. Well, rejoice! This delightful Nut Free Pesto recipe delivers all the bright, garlicky, cheesy goodness you crave, without a single nut in sight. It’s a revelation, transforming pasta dishes, grilled chicken, or even a simple slice of toast into something extraordinary. What truly makes this Nut Free Pesto special is its versatility and its ability to cater to a wider audience, ensuring everyone can experience the joy of this classic Italian sauce. Get ready to impress your friends and family, and rediscover your love for pesto in this wonderfully inclusive and utterly delicious way.
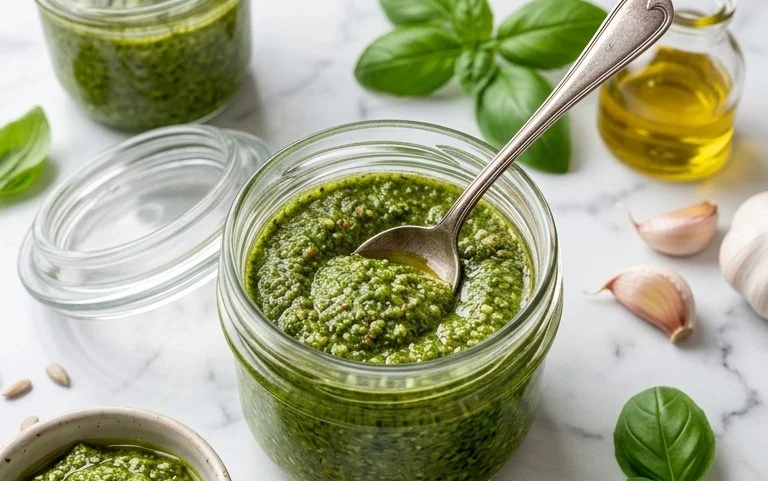
Delicious Nut-Free Pesto: A Burst of Fresh Flavor for Everyone!
Pesto is a culinary marvel, a vibrant green sauce that instantly elevates pasta, sandwiches, and so much more. Traditionally, it’s made with pine nuts, which are delicious but unfortunately off-limits for many due to allergies. But don’t fret! Today, I’m sharing my go-to recipe for a fantastic nut-free pesto that delivers all the classic, herbaceous goodness without any of the allergenic culprits. This recipe is incredibly simple to make, requiring just a handful of fresh ingredients and a few minutes of your time. It’s perfect for anyone with nut allergies, or even if you simply find yourself without pine nuts on hand. The bright, fresh taste of basil, the punch of garlic, and the salty tang of Parmesan cheese come together to create a versatile sauce that will become a staple in your kitchen. Let’s get started!
Ingredients:
Crafting Your Nut-Free Pesto
Creating this delicious pesto is a joyfully straightforward process. The key is to use the freshest ingredients possible to unlock the most vibrant flavors. For the basil, make sure the leaves are bright green and free from any wilting. You’ll want to pack them into your measuring cup to ensure you get the full two cups. This amount will give you a good, robust basil flavor. When it comes to garlic, two cloves might sound like a lot, but once blended, they provide a wonderful depth of flavor without being overpowering. If you’re sensitive to raw garlic, you can roast the garlic cloves briefly before adding them for a mellower taste. As for the Parmesan cheese, grating it yourself just before you start will make a noticeable difference in texture and flavor compared to pre-grated varieties. And of course, a good quality extra virgin extract olive oil will carry all these beautiful flavors beautifully.
Step-by-Step Instructions
1. Prepare Your Basil: Begin extract by washing your fresh basil leaves thoroughly under cool water. Gently pat them dry with paper towels or a clean kitchen towel. It’s crucial to ensure the leaves are dry, as excess water can dilute the flavor of your pesto and make it a bit watery. Remove any thick stems, as these can sometimes add a slightly bitter taste and a stringy texture to the pesto. You want to use just the tender leaves.
2. Add Initial Ingredients to Food Processor: Place the cleaned and dried basil leaves into the bowl of a food processor. Add the peeled garlic cloves to the food processor as well. Give the ingredients a quick pulse a few times to begin extract breaking them down. This initial pulsing helps to create more surface area for the oil to work its magic on. Don’t worry if it’s not fully chopped yet; we’ll get there.
3. Incorporate Cheese and Seasonings: Now, add the freshly grated Parmesan cheese to the food processor. Sprinkle in the salt and black pepper. Pulse again a few times to combine everything. At this stage, you’ll start to see the ingredients mingling, and the aroma will begin extract to develop. The Parmesan adds a lovely salty, umami note that is essential to a classic pesto.
4. Gradually Drizzle in Olive Oil: With the food processor running on a low speed, slowly drizzle in the olive oil through the feed tube. Continue processing until the mixture is mostly smooth but still has a bit of texture. You’re looking for a consistency that’s not completely puréed, but rather a slightly coarse, pesto-like texture. You can adjust the amount of olive oil to your desired consistency. If you prefer a thicker pesto, use a little less oil. If you like it looser, add a touch more. It’s easier to add more oil than to take it away, so start with the recommended amount and adjust as needed.
5. Taste and Adjust Seasoning: Once you’ve reached your desired consistency, stop the food processor and give the pesto a good taste. This is your chance to perfect the flavor! Does it need a little more salt to bring out the basil and cheese? Perhaps a touch more pepper for a subtle kick? Adjust the seasonings according to your personal preference. Remember, the flavor will continue to develop slightly as it sits. You can also add a squeeze of fresh lemon juice at this stage for a brighter, more zesty flavor, though it’s not traditional, it’s a delicious variation many people enjoy.
Serving and Storing Your Nut-Free Pesto
This nut-free pesto is incredibly versatile. Toss it with your favorite pasta for a quick and delicious meal. It’s also fantastic spread on sandwiches or wraps, dolloped onto grilled chicken or fish, or used as a dip for fresh vegetables.
To store your pesto, transfer it to an airtight container. For best results and to preserve its vibrant green color, pour a thin layer of olive oil over the top of the pesto before sealing the container. This acts as a barrier against oxidation. You can store your nut-free pesto in the refrigerator for up to a week. If you plan to keep it longer, consider freezing it in ice cube trays for convenient, single-serving portions. Once frozen, transfer the pesto cubes to a freezer-safe bag. Enjoy this delightful, allergy-friendly sauce whenever the craving strikes!
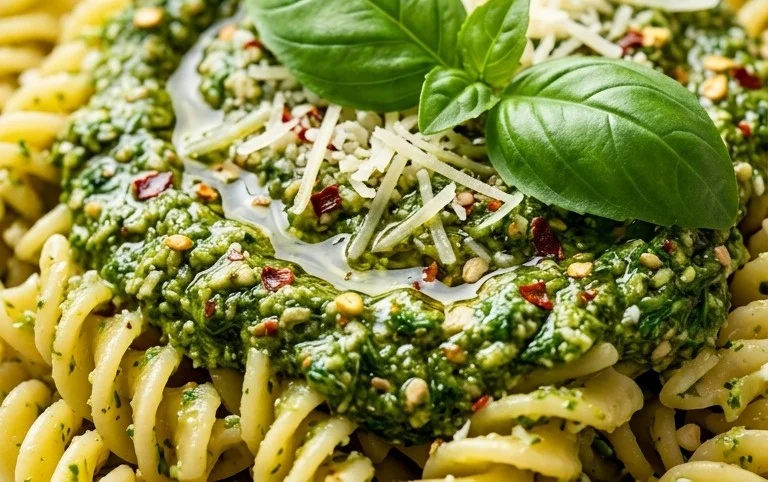
Conclusion:
I hope you’ve enjoyed exploring this delicious nut free pesto recipe! It’s a fantastic option for anyone with nut allergies or simply looking for a lighter, brighter flavor profile in their pesto. The absence of nuts doesn’t diminish its vibrant taste; instead, it allows the fresh basil, garlic, and Parmesan to truly shine. This recipe is so versatile and incredibly easy to whip up, making it a perfect go-to for weeknight meals and entertaining alike.
Think about tossing it with your favorite pasta, spreading it on grilled chicken or fish, or even dolloping it onto roasted vegetables. The possibilities are truly endless! Don’t hesitate to experiment with the seeds in this recipe; sunflower seeds offer a lovely texture and mild flavor, while pumpkin seeds can add a slightly earthier note. Feel free to adjust the garlic and lemon juice to your personal preference. I truly encourage you to give this nut free pesto a try – you might just find it becomes your new favorite!
Frequently Asked Questions about Nut Free Pesto:
Q: How long does this nut free pesto last?
A: Stored properly in an airtight container in the refrigerator, this nut free pesto should last for about 5-7 days. You can also freeze it in an ice cube tray for smaller, convenient portions to use later.
Q: Can I substitute the basil?
A: Absolutely! While basil is traditional, you can certainly get creative. Spinach, arugula, or a mix of herbs like parsley and mint can create wonderfully unique pesto variations.
Q: What kind of oil is best to use?
A: Extra virgin extract olive oil is highly recommended for its flavor. A good quality olive oil will contribute significantly to the overall taste of your pesto. You can also use a lighter olive oil if you prefer a less intense olive flavor.
Nut-Free Pesto
A classic pesto recipe made without nuts, perfect for those with allergies or simply a desire for a different flavor profile. This versatile sauce is great on pasta, sandwiches, or as a dip.
Ingredients
-
2 cups fresh basil
-
2 garlic cloves
-
1/2 cup freshly grated Parmesan cheese
-
1/4 cup olive oil
-
1/4 teaspoon salt
-
1/8 teaspoon pepper
Instructions
-
Step 1
Wash and thoroughly dry the fresh basil leaves. -
Step 2
Peel and roughly chop the garlic cloves. -
Step 3
In a food processor, combine the basil, garlic, and Parmesan cheese. -
Step 4
Pulse the ingredients until they are roughly chopped. -
Step 5
Slowly drizzle in the olive oil while the food processor is running, until the pesto reaches your desired consistency. -
Step 6
Season with salt and pepper to taste, and pulse once more to combine.
Important Information
Nutrition Facts (Per Serving)
It is important to consider this information as approximate and not to use it as definitive health advice.
Allergy Information
Please check ingredients for potential allergens and consult a health professional if in doubt.