Buster Bar Ice Cream Dessert Recipe- Easy & Delicious
Buster Bar Ice Cream Dessert is more than just a frozen treat; it’s a nostalgic trip back in time, a celebration of simple, pure joy. Remember those iconic candy bars, with their distinct layers of chocolate, ice cream, and a crunchy core? This homemade Buster Bar Ice Cream Dessert captures all that magic and elevates it into an unforgettable homemade experience. We’re talking about that irresistible combination of creamy vanilla ice cream, a rich chocolatey coating, and that satisfyingly chewy, nutty surprise in the center that makes every bite an adventure. It’s the perfect dessert for a hot summer day, a family gathering, or honestly, just because you deserve a little indulgence. Get ready to unlock the secret to recreating this beloved classic in your very own kitchen, because once you try this Buster Bar Ice Cream Dessert, you’ll wonder why you ever settled for less.
Why You’ll Adore This Recipe:
It’s surprisingly easy to make, delivering that authentic Buster Bar flavor profile that will have everyone asking for seconds!
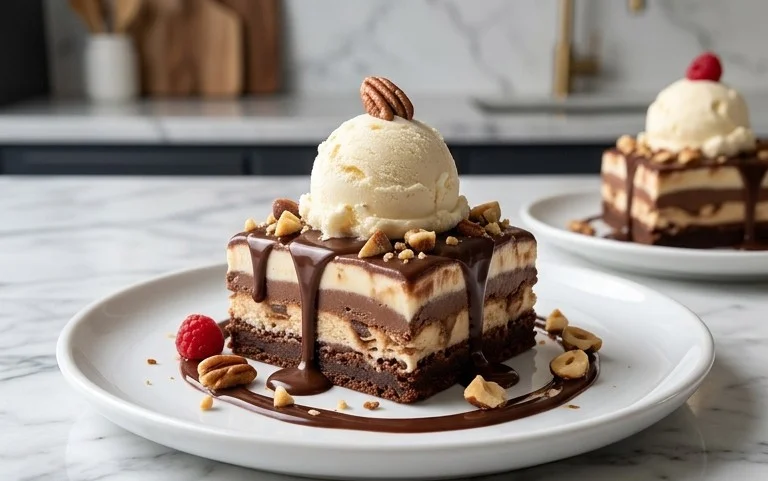
Buster Bar Ice Cream Dessert
This Buster Bar Ice Cream Dessert is a nostalgic trip back to childhood summers and those iconic chocolate-covered, peanut-studded ice cream bars. It’s a remarkably simple yet utterly decadent dessert that truly captures the essence of that beloved treat. Forget the freezer aisle; we’re making our own version, and let me tell you, it’s even better when made with love (and a little butter!). This recipe is perfect for parties, potlucks, or just a special treat for yourself. It requires a little bit of freezer time, but the active preparation is surprisingly quick, making it an ideal make-ahead dessert. The combination of crunchy cookie crust, creamy ice cream, salty peanuts, and rich chocolate ganache is simply irresistible.
Ingredients:
Preparing the Foundation
The first step in creating our delicious Buster Bar Ice Cream Dessert is to build a solid and flavorful base. This is where our crushed Oreo cookies come into play. For the best texture, I like to use a food processor to get a fine crum extractb, but you can also place the cookies in a sturdy zip-top bag and crush them with a rolling pin. You want them to be fine enough to hold together when pressed.
Once your Oreos are nicely crushed, it’s time to combine them with the melted butter. In a medium bowl, pour the melted butter over the cookie crum extractbs. Stir until all the crum extractbs are moistened and the mixture resembles wet sand. This butter acts as the binder, holding our crust together. Now, take a 9×13 inch baking dish. I like to press this mixture firmly and evenly into the bottom of the dish. You can use the back of a spoon or the bottom of a measuring cup to ensure a compact and uniform layer. This will prevent your crust from crum extractbling when you slice into the finished dessert. Pop this crust into the freezer for at least 30 minutes to set while we prepare the next layer. This chilling step is crucial for a clean slice later on.
Building the Creamy Core
With our Oreo crust chilling, we can move on to the heart of our Buster Bar: the ice cream. For this recipe, we’ll be using a full half-gallon of vanilla ice cream. It’s important to let the ice cream soften slightly before you begin extract. You don’t want it completely melted, but just soft enough to spread easily. Leaving it out on the counter for about 15-20 minutes usually does the trick.
Once softened, spread the vanilla ice cream evenly over the chilled Oreo crust. Again, try to get a nice, smooth layer. If the ice cream starts to melt too much, you can always pop the dish back into the freezer for a few minutes to firm it up before continuing. Once the ice cream layer is complete, return the entire dish to the freezer. We need this layer to freeze solid, which will likely take at least 2-3 hours, depending on your freezer’s temperature. Patience here is key to achieving those clean, defined Buster Bar squares.
The Irresistible Peanut Crunch
Now comes one of my favorite parts – adding that signature peanut crunch! For this Buster Bar creation, we’re going to use a whole pound of Spanish peanuts. Spanish peanuts have a wonderful sweet and nutty flavor that pairs perfectly with the ice cream and chocolate. You have a couple of options here for how you incorporate them. You can either sprinkle them generously and evenly over the frozen ice cream layer, or for a more integrated crunch, you can gently press them into the ice cream. I prefer the latter, as it ensures you get peanuts in every bite. Just make sure to distribute them as evenly as possible. Once the peanuts are in place, pop the dish back into the freezer. This layer doesn’t need extensive freezing time, but allowing it to chill for another 30 minutes will help set the peanuts before we add the final topping.
Crafting the Luscious Chocolate Shell
The crowning glory of our Buster Bar Ice Cream Dessert is the rich, homemade chocolate topping. This is essentially a simple chocolate ganache that hardens beautifully into that classic candy-bar coating. In a medium saucepan, combine the semi-sweet chocolate chips, the remaining 1/2 cup of butter, and the evaporated milk. Place the saucepan over low to medium-low heat. It’s important to stir this mixture constantly and gently. You don’t want to scorch the chocolate or the butter. The goal is to melt everything together until you have a smooth, glossy, and completely homogenous chocolate sauce. This process should take about 5-7 minutes. Be patient and keep stirring.
Once the chocolate mixture is smooth and glossy, remove it from the heat. Now, here’s a crucial step: let this chocolate ganache cool slightly. If it’s too hot, it will melt the ice cream underneath. You want it warm enough to pour easily but not so hot that it becomes a liquid mess. Stirring it occasionally while it cools will help prevent a skin from forming on top. Aim for a consistency that pours but isn’t runny.
Assembly and Final Freeze
With our chocolate ganache cooled to the perfect pouring temperature, it’s time to bring it all together. Take your frozen dessert out of the freezer. Pour the slightly cooled chocolate ganache evenly over the peanut-covered ice cream layer. Use an offset spatula or the back of a spoon to gently spread the chocolate to the edges of the dish, ensuring complete coverage. This chocolate layer is what will give you that satisfying crack when you cut into the dessert. Once the chocolate topping is smoothed out, it’s time for the final, and longest, freeze. Return the entire dish to the freezer for at least 4-6 hours, or preferably overnight. This will ensure that the ice cream is completely frozen and the chocolate shell is firm and ready to be cut.
Serving Your Masterpiece
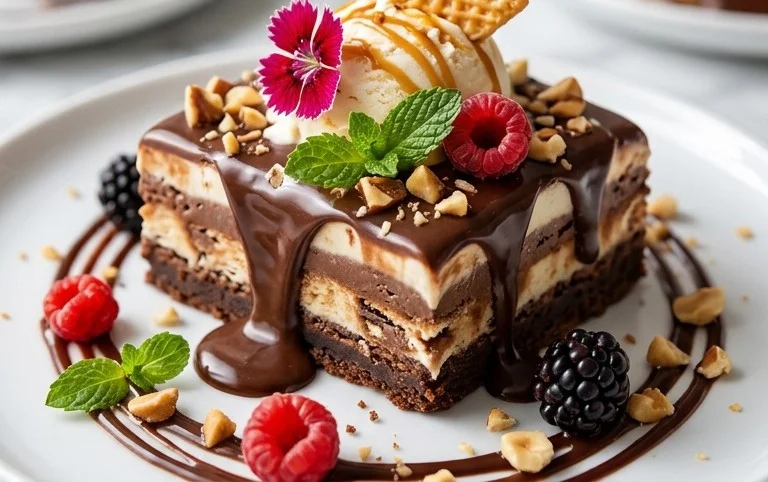
Once your Buster Bar Ice Cream Dessert is completely frozen, it’s time to serve! To get those clean, Buster Bar-like squares, I recommend a hot knife. Dip a sharp knife into a tall glass of hot water, wipe it dry with a towel, and then carefully slice into the dessert. Reheat and wipe the knife as needed between cuts. You can also simply scoop it like ice cream, but slicing creates that authentic bar experience. Enjoy this delightful homemade treat that’s sure to bring back sweet memories!
Conclusion:
And there you have it – your very own homemade Buster Bar Ice Cream Dessert! This recipe is truly a winner because it captures all the irresistible elements of the classic treat: the rich chocolate coating, the creamy peanut butter ice cream, and that delightful crunchy texture. It’s surprisingly simple to make, making it perfect for both novice bakers and seasoned dessert enthusiasts alike. Imagin extracte the joy on your family’s faces when you present them with this decadent creation!
For serving, I love to cut it into generous squares and serve it straight from the freezer. It also makes a fantastic base for a more elaborate sundae – add extra hot fudge sauce, whipped cream, and a sprinkle of chopped peanuts for an ultimate indulgence. Don’t be afraid to get creative with variations! You could try adding mini chocolate chips to the ice cream base, a swirl of caramel, or even experiment with different nut butters for a unique twist on the classic Buster Bar flavor. I truly encourage you to give this recipe a try; it’s a guaranteed crowd-pleaser and a delicious way to beat the heat!
Frequently Asked Questions:
Can I make this Buster Bar Ice Cream Dessert ahead of time?
Absolutely! This dessert is perfect for making in advance. Once it’s completely frozen and firm, you can keep it wrapped tightly in the freezer for up to two weeks. Just let it sit at room temperature for a few minutes before slicing and serving for the best texture.
What if I don’t have peanut butter? Can I substitute something else?
While peanut butter is key to the classic Buster Bar taste, you can experiment! Almond butter or even sunflower seed butter (for a nut-free option) can work, though the flavor profile will change. Just ensure your chosen substitute is smooth and creamy for the best results in the ice cream base.
Buster Bar Ice Cream Dessert
A no-bake ice cream dessert featuring a crushed Oreo crust, creamy vanilla ice cream, a peanut and chocolate topping, and a fudge drizzle.
Ingredients
-
1 14.3 oz pkg. of Oreo cookies, crushed
-
1/2 C butter, melted
-
1/2 gal. vanilla ice cream, softened
-
1 lb. Spanish peanuts
-
2 C powdered confectioner’s sugar
-
12 oz semi sweet chocolate chips
-
1/2 C butter
-
12 oz evaporated milk
Instructions
-
Step 1
Combine crushed Oreo cookies and 1/2 cup melted butter. Press into the bottom of a 9×13 inch pan. -
Step 2
Spread softened vanilla ice cream evenly over the cookie crust. -
Step 3
Sprinkle Spanish peanuts over the ice cream layer. -
Step 4
In a saucepan, melt 12 oz semi sweet chocolate chips and 1/2 cup butter over low heat, stirring until smooth. Remove from heat and stir in 12 oz evaporated milk and 2 cups powdered confectioner’s sugar until smooth and thick. -
Step 5
Pour the chocolate fudge mixture over the peanut layer, spreading to cover. -
Step 6
Freeze for at least 4 hours, or until firm. Cut into squares and serve.
Important Information
Nutrition Facts (Per Serving)
It is important to consider this information as approximate and not to use it as definitive health advice.
Allergy Information
Please check ingredients for potential allergens and consult a health professional if in doubt.